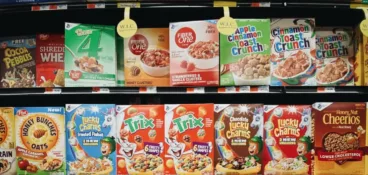

If you want to run an efficient and profitable business, you need to strive for perfection when it comes to packaging.
Here’s why: 43% of product recalls are due to mislabeling.
This means that two times out of five, the product is absolutely fine. But all it takes is a tiny error on the label to cost your company thousands in transportation, artwork, and reprinting costs. And if those mistakes involve food allergens or drug dosage on medicine packaging and the lawyers come knocking, those costs can quickly spiral into the millions.
So how do you get your packaging right the first time, every time? You invest in your artwork approval and packaging management process! After all, it’s better to spend one dollar now if it can save you one hundred later, right?
Let’s look at the five essential steps to make your packaging approval process fast and foolproof.
The fast way to get feedback on packaging
Get clear and collaborative comments right on top of your packaging artwork.
Step 1: Switch from email to approval software
If there’s one thing you can rely on with email, it’s that your files will get lost and your messages will go unanswered.
So if you’re still using email to review packaging labels, you’ve probably faced at least one of these problems:
- Feedback is scattered across multiple email chains
- None of your stakeholders are communicating
- Nobody knows which version is the latest
- There’s no easy way to see who’s approved what
In one way or another, all of these issues cost you. It could be adding unnecessary review rounds because feedback was misinterpreted, or sending an approval form around the office like it’s 1953 to double-check that the packaging is ready for printing.
But what if I told you that approval software can solve all these problems and more? With Filestage, you can share, discuss, and approve your packaging artwork in your browser – all in one collaborative workspace.
Let’s look at a few of the benefits below.
Share feedback in context to reduce misunderstandings
Filestage gives you shared space to upload files and add feedback, right there in your browser.
You can zoom in and rotate your artwork file to hone in on the finest of details. Then simply tap to create a marker and comment, adding annotations and attachments to make your points crystal clear.
This dramatically speeds up the time it takes to share feedback. Instead of taking screenshots or explaining which part of the design you’re talking about, you just have to click on it!
Improve transparency to cut out unnecessary review rounds
The big benefit of adding feedback right on top of your artwork is that you can see everyone else’s feedback in the same place.
This is great for two important reasons:
- You don’t have to waste time repeating what someone else has already said. You can just comment saying “I agree” or give them a thumbs up.
- You can deal with any disagreements in context, saving designers from having to deal with conflicting comments.
This has a huge (and positive) impact on your packaging design process.
Use version control so everyone knows where to find the latest artwork
When you upload a new version in Filestage – v3 of your beer bottle artwork, for example – you can add it as a new version of the same file.
Here are a few ways this helps you and your reviewers:
- You know that the version you see on your project dashboard is the latest
- If reviewers open a previous version, a popup will appear to tell them there’s a newer one
- All your previous versions and comments are easily accessible from a dropdown menu
You can also compare artwork versions and comments side by side, but we’ll get into that in step three.
Track approvals in real time so you can go to print with confidence
Picture this.
You’re just coming to the end of your packaging design workflow. You’ve spent weeks creating and perfecting your artwork. But just before you go to print, you want to double, triple, and quadruple check that everything is fully, fully, fully signed off.
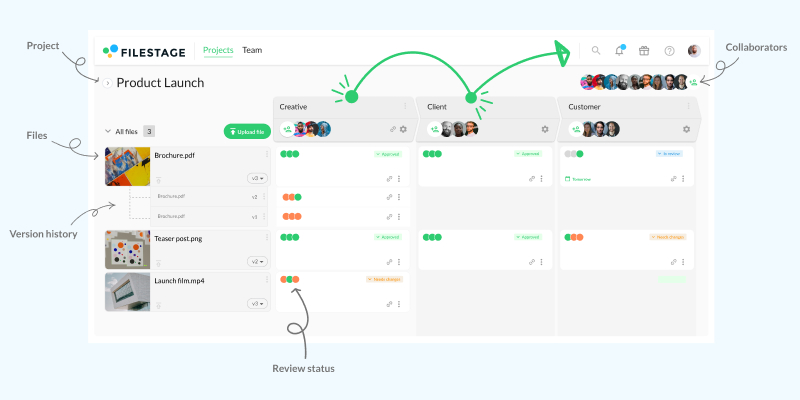
In Filestage, all you have to do is open your project dashboard. From there, you’ll see clear status indicators with timestamps for each version and reviewer. (We’ll talk about those a bit more in step five!)
Step 2: Set up your packaging artwork approval workflow
Now that you’ve made the switch to using software for your packaging artwork approvals, you need to know how to set up your projects and manage your artwork like a pro.
Let’s start with defining your stakeholders.
Define who needs to approve your artwork
Before even starting your packaging approval process, think about who needs to be involved.
This could be any number of people, including:
- Designer
- Artworker
- Copywriter
- Marketing Manager
- Brand Manager
- Compliance Specialist
- Legal Counsel
- And the list goes on …
Once you’ve put your list together, it will naturally fall into two or three categories – and that’s where proof approval steps come in.
Create review steps for each stage of the process
Quick question: do you want all your reviewers (from design to legal) weighing in on your label artwork at the same time?
Of course not. You don’t want lawyers weighing in on the fineprint while designers are still debating which font to use – which is why you need review steps.
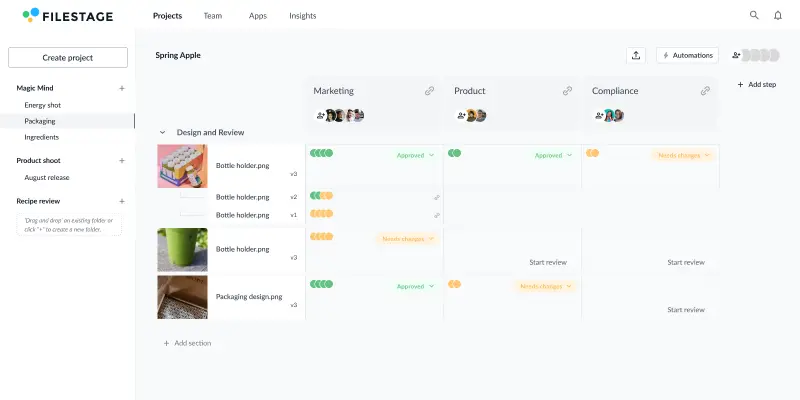
Review steps are the stakeholder groups your artwork needs to go through before you can confidently send it to print, for example:
- Design and Creative
- Brand and Marketing
- Legal and Compliance
In Filestage, you can set these up as an approval workflow, moving your files from one step to the next until everyone is happy.
Set up a template to make sure everyone follows the same steps
Once you’ve established your workflow and optimized it for maximum speed and quality, you can turn it into a template.
This can include things like:
- Review steps
- The reviewers in each step
- Sections to keep your files organized
- Automations (more on those in step four)
Templates are great for standardizing processes across your organization. If everyone follows the same steps every time, you’ll achieve packaging approval faster while reducing mistakes. Win and win!
Step 3: Share artwork files and collaborate in the comments
It wouldn’t be much of a packaging approval process without your artwork files, would it?
Let’s look at how you can share files, add comments, and verify changes – all in one place.
Upload your design files
In Filestage, uploading files is as easy as dragging them from your desktop into your project dashboard. You can also use sections to organize them, helping to keep all the files related to your project in one place.
Then you, your teammates, and reviewers can click on them to view them in your browser. And that’s where the feedback part begins.
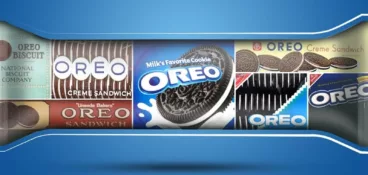
Need some inspiration? Check out our roundup of the best pharmaceutical packaging designs. Or if you beauty is more your thing, take a look at some of our favorite cosmetics packaging.
Add point-and-click comments in your browser
Giving feedback in Filestage is as easy as pointing to the part you want to see changed, clicking on it, and adding a comment. To make your comments clearer, you can also add annotations and attachments.
Here are a few tips on what to look out for to make sure your label is compliant:
- Name of the product
- Ingredient list, including quantities for each ingredient
- Allergy information
- Best before and use by dates
- Country of origin
- Name and address of the business or manufacturer
- Net quantity of the product
- Advice for storage
- Usage instructions
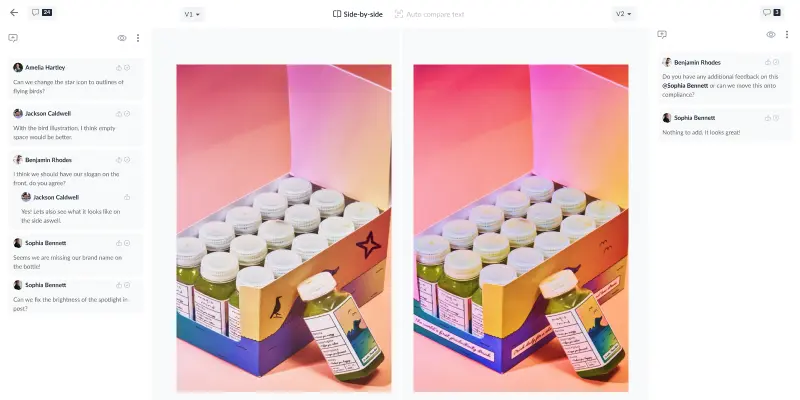
Compare versions side by side to verify changes
One of the most important parts of the artwork approval process is verifying that comments have been actioned.
To help with this, Filestage includes a handy compare versions feature that lets you see any two versions (and all their comments) side by side. So as soon as the new version arrives, you can hit that compare button, check your comments from last time, and – hopefully – mark it as approved!
Step 4: See every approval and change request in one place
At the end of every review round in Filestage, your stakeholders will have a choice of two buttons:
- Approve
- Request changes
This gives you a clear overview of what’s happening at any given time. And it also lets you use automations to keep your projects moving forwards.
Let’s look at these points in a little more detail.
Check status indicators to see when files are approved
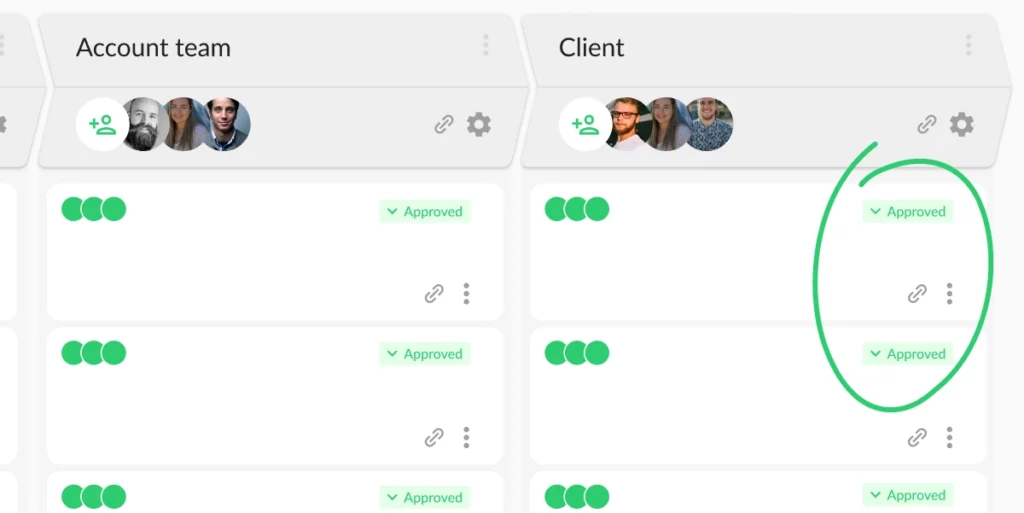
On your project dashboard, you’ll see a status indicator for each person in your review steps.
These tell you whether the reviewer has:
- Approved the version (green)
- Requested changes to the version (orange)
- Not yet reviewed the version (gray)
And best of all, nobody can change their decision. So, when they’re all green, you know you’re good to go!
Use automations to instantly start the next review step
When you combine status indicators with automations, your approval process truly takes care of itself.
In Filestage, you can set up an automation to instantly start the next review step when everyone approves the latest version of your packaging artwork.
Think of that for a second. There’s no time delay between the approval happening and you realizing that it’s happened. There’s no email to write. You just press go and let Filestage take care of the rest!
Step 5: Print your packaging artwork with confidence
Once your artwork is done and approved, and all potential bad packaging design ideas are ironed out, it’s time to send your artwork to print.
If you set up your artwork approval process following the steps above, you will:
- Speed up the time it takes to give and receive feedback on packaging artwork
- Reduce the number of unnecessary review rounds due to misunderstandings
- Cut the time between each stage of your packaging approval workflow
- Be able to find the latest version of your label designs in seconds
- See exactly who has given their approval at a glance
So not only will you be able to send your artwork to print sooner, you’ll also be able to do it with more confidence than ever.
Conclusion
In the end, a solid packaging approval process helps teams catch mistakes early, speed up feedback rounds, and make sure artwork is ready to print with confidence. By moving away from email and centralizing reviews in one collaborative space, you reduce errors and keep everyone on the same page. With the right tools and workflow in place, you’ll save time, cut costs, and deliver perfect packaging every time.
Need some inspiration for your next packaging design? Get inspired by some of the best Apple packaging designs and deliver a slick and modern solution to your audience.
FAQ
What is a packaging approval process?
A packaging approval process is a structured way to review and approve packaging designs before they go to print. It helps teams collect feedback, make revisions, and get final sign-off from all stakeholders in one place. This ensures the packaging is accurate, compliant, and ready for production.
Why do I need a packaging approval process?
You need a packaging approval process to avoid costly mistakes like incorrect text, missing labels, or outdated designs. It keeps everyone aligned, speeds up reviews, and reduces back-and-forth emails. In the end, it saves time, money, and reduces stress.
What is packaging compliance?
Packaging compliance means making sure your packaging follows all legal, regulatory, and industry requirements. This can include safety warnings, labeling rules, and regional regulations. Staying compliant helps you avoid fines, recalls, and legal issues.