In today’s competitive landscape, first impressions matter more than ever. Seven in 10 customers are swayed by packaging design, so there’s no denying the importance of getting your packaging just right.
And to do that, you’ll need to take a well-organized approach to packaging design.
With that in mind, here is the ideal 11-step packaging design process:
- Design brief – setting out the goals and strategy of your packaging design
- Research phase – learning about the market or users you’re designing packaging for
- Concepts – brainstorming ideas for your packaging design
- Concept development – polishing and refining your ideas
- Design review – getting feedback on your packaging design ideas
- Iterate – improving your designs and collecting more feedback
- Prototypes – creating and testing prototypes of the packaging design
- Iterate – improving your designs again
- Approve – getting sign-off from your stakeholders
- Print – preparing and printing your designs
- User testing – collecting feedback from real users or customers
Let’s go through each step in more detail, and look at how to optimize each one for an efficient packaging design process from start to finish.
10 best packaging design software for every use case
Discover the best tools for 3D design, workflow management, and stakeholder approvals.
1. Design brief – setting out the goals and strategy of your design
As a packaging designer or a graphic designer, you already know that a design brief is the cornerstone of any design project. It’s what you and your team will keep referring back to throughout the entire packaging management process to make sure you’re staying on track.
The brief for your packaging design project should set out the main project goals, so that everyone involved knows the plan.
There are five key things to think about here:
- The purpose of the packaging
- Your target audience
- Brand guidelines
- Specific content that needs to be include
- Budget and deadline
Let’s look at those in more detail.
The purpose of the packaging
What type of packaging are you creating? Is it outer packaging, inner packaging, or product packaging? This will help to determine the main objectives of the packaging, whether that’s to showcase your brand, protect the product within, or help with transportation.
Another point to consider here is the main sales channel for the product. Will you be stocking in retail stores, or on e-commerce sites? Different sales channels have different requirements for packaging – including things like safety, storage, shipping features – so it’s important to consider this early on.
Let’s have a quick look at some key differences to consider:
- Retail packaging: Retail or cpg packaging needs to have shelf appeal. The aim should be to grab the attention of consumers as they browse the shelves, standing out against the competition. The product packaging needs to be durable enough for regular handling by customers, and usually needs to adhere to specific size and weight restrictions set by retailers. It should be easy to stack, store, and display in-store.
- E-commerce packaging: Product packaging for e-commerce needs to be particularly durable during shipping, and it should be designed in a way that is space-efficient in order to reduce shipping costs. Product information should also be optimized for online shoppers, including info like dimensions and specifications that aren’t as clear when shopping online.
The unboxing experience is another big consideration for both retail e-commerce. You have the chance to add the wow factor here, adding fun design elements like inserts and personalized notes to create a memorable experience for the customer. So, go big with your box design ideas.
Your target audience
Pinpoint the target market of your product. Defining this early on will help to shape your designs from the get go. More on this in the next step!
Brand guidelines
Whether you’re designing packaging for your own business or for a client, gather everything you need in the way of brand guidelines before you get started with the packaging design process. This may include colors, fonts, logos, other types of brand imagery, and specific brand messaging.
Specific content that needs to be included
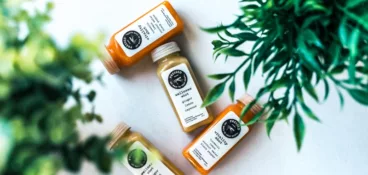
As well as brand messaging, find out if there is other essential information to include on the packaging. Examples include product details, imagery, barcodes, nutritional facts, and blank spaces for expiration dates or batch numbers.
This plays a particularly big part in regulated industries like pharma, healthcare, or food industry. Things like food labels or medicine packaging are highly regulated with strict laws and regulations that no company can afford to dismiss.
Budget and deadline
You’ll want to have a ballpark idea of how much budget you have to work with before you start the packaging design process. Your budget should include everything from design through to printing and assembly.
It’s also good to be clear about deadlines so that you can set a clear time frame for each stage of the packaging design process.
Take your time to get organized and create a detailed brief. You won’t regret it.
2. Research phase – learning about the market or users you’re designing packaging for
Brief complete. Now it’s time to get your researcher hat on.
Spend some time carrying out market research to gather information about your target audience, competitors, and trends in the packaging industry. Having a good understanding of what’s already out there, what works and what doesn’t, and your audience’s likes and dislikes will help you to design packaging that is unique, effective, and appealing to the people that matter.
Style research should also come in at this point too. Make note of particular designs and ideas that jump out at you. You might jot down specific colors or materials that catch your eye – perhaps even create a moodboard. You don’t have to make any immediate decisions, but getting a feel for what you like and dislike will help when you start with your designs.
Check out these packaging design ideas for inspiration! Or take a look at some of the best Apple packaging designs, and get inspired by one of the best in the industry.
3. Concepts – brainstorming ideas for your packaging design
Researcher hat off, creative hat on – it’s time for the fun part!
At this step of the packaging design process, you get to dream up as many ideas as possible. They don’t have to be fully-formed ideas by any means – this is your chance to cast your net wide and cover all areas.
Here are some key things to consider as part of your brainstorm:
- Colors
- Materials
- Shapes
- Typography
- Graphics
- Imagery
- Moods and emotions
- Narratives
Invite your colleagues or client to throw their ideas into the mix – either as part of an in-person brainstorming session, a virtual session using an online whiteboard, or a remote, asynchronous session that individuals can contribute to at a time that suits them. And don’t forget to look for inspiration beyond your category. You may find great ideas from food packaging examples or pharmaceutical packaging designs.
The benefit of the latter is that it makes remote collaboration easy. You don’t have to worry about coordinating different schedules, or even time zones.
Here are a few packaging and graphic design project management software you can use to organize asynchronous yet effective brainstorming sessions:
- Google Docs – With this easy-to-use tool, you can create a document that everyone can add their ideas to, whenever it suits them. Add comments, images, and links, develop someone else’s idea, or comment on elements that stand out to you.
- Canva – This highly visual design collaboration tool is loved by graphic designers. It allows you to create a moodboard as part of your packaging design brainstorm. Invite team members to add their ideas as well as add real-time comments and reactions.
- Miro – This online collaborative whiteboard platform is designed to help teams work together on projects from anywhere, at any time. Create brainstorming boards that stakeholders can add their ideas to in the form of sticky notes, drawings, diagrams, images, gifs, and more.
As you brainstorm, remember to refer back to the brief and keep the project objectives in mind.
By the end of this step, you should have a pretty good idea of the design concepts you’re going to take forward and roll with.
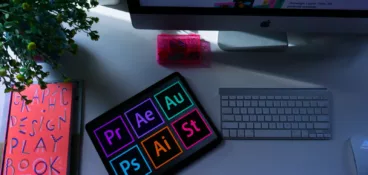
4. Concept development – polishing and refining your ideas
Now’s the time to take all those amazing ideas and turn them into something spectacular! This is where your design team can really show off their skills and create something that’s both visually appealing and highly functional.
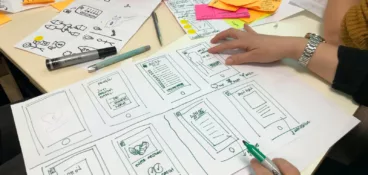
The concept development phase, or the design phase, will typically involve three subphases:
- Sketching and wireframing – Start by sketching out your ideas, either on paper or using digital design tools. Experiment with different layouts and visual elements, making sure your brand identity is well communicated. As ever, keep referring back to that brief to double-check that your designs align with your objectives.
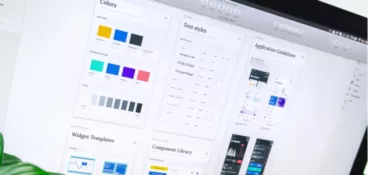
- Digital design – Once you’ve got a few promising concepts that are starting to take shape, start translating them into digital designs. Harness the power of specialist packaging design software to bring your creative ideas to life.
- Structural design – At this point you should also add die lines and cut lines to your design. If your packaging design involves custom structures, you may need to work with a structural designer on the shape and dimensions of the packaging. Consider functionality, ease of assembly, and manufacturing – anything too off-piste could be detrimental in the long run.
You’ll now have a package design – or perhaps several design options – that you can take forward for feedback.
10 best packaging design software for every use case
Discover the best tools for 3D design, workflow management, and stakeholder approvals.
5. Design review – getting feedback on your packaging design ideas
It’s time to put your packaging design to the test!
The design review process involves getting structured and meaningful feedback on your work. The purpose of this is to make sure all the information included is accurate, your design hits the brief, and it’s ultimately the best version of itself that it can possibly be.

Different stakeholders will be involved at different steps of the process, but typical reviewers include:
- The wider design team
- Art directors
- Creative directors
- Copywriters
- Project managers
- Account managers
- Marketing managers
- Brand managers
- Product managers
- Compliance specialists
- Clients
One of the best ways to optimize the review process, especially when there are lots of stakeholders involved, is by implementing a design review tool. It’ll help you collect and organize everyone’s feedback, saving you time and making it easier to improve your packaging design.
Here are a few ways packaging approval software, Filestage, makes it easy to review packaging designs:
- Set up project workflows to manage all your packaging design assets and stakeholders in one place
- Get fast and accurate feedback with point-and-click comments and annotations
- Zoom in and rotate your designs to give feedback on every detail
- Set due dates to keep your packaging design project on track
- Track approvals and change requests at a glance from your dashboard
6. Iterate – improving your designs and collecting more feedback
Designs are rarely a hole-in-one. To avoid making bad packaging design choices, your packaging and label design will likely need to go through multiple review stages and iterations before it’s ready to be printed.
Once you’ve collected all that valuable feedback, work your way through it and improve your designs. Then when you’re ready, collect more feedback.
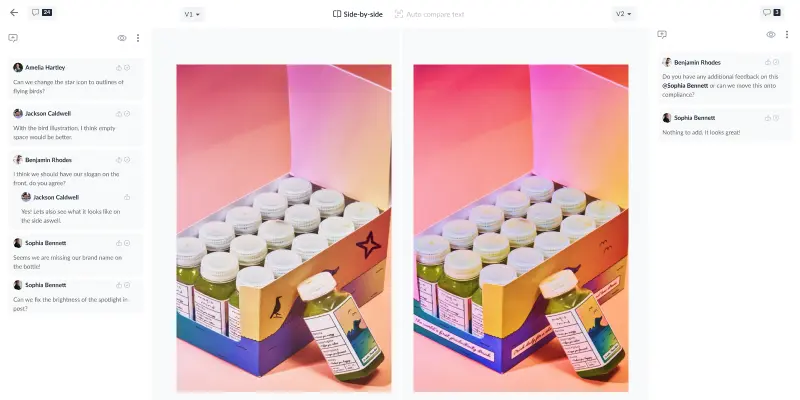
Here are three ways Filestage makes design iteration easier:
- Keep versions organized in one platform so you can easily see the history of your designs
- Compare two versions of your package design side by side to see what’s changed
- Tick off feedback as you work on the next version to make sure everyone’s feedback has been met
After a few iteration rounds, you’ll be ready to get prototyping!
And if you want some inspiration on what NOT to do, check out our packaging horror stories.
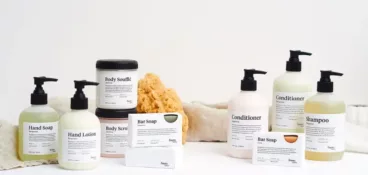
7. Prototypes – creating and testing prototypes of the packaging design
Creating and testing prototypes of your package design is a crucial step in the packaging design process. It allows you to bring your design concept to life and evaluate its visual appeal, functionality, and overall effectiveness.
Let’s explore what to look out for when testing your mockups.
Visual appeal
With a prototype in hand, you can assess the visual aspects of your packaging design – and how they translate from the page to real life.
Here are some key factors to consider:
- Examine the colors, typography, graphics, and overall aesthetic appeal
- Evaluate your choice of packaging material, and how it looks and feels
- Make sure the information architecture works as it should
- Check that the design aligns with your brand identity
- Think about whether it creates the emotional impact you’re hoping for
Functionality
Test that your packaging prototype functions as it should, and meets the practical needs of both the product and the customer.
Here are some key factors to consider:
- Ease of assembly
- Accessibility and ease of use
- Opening/closing mechanisms
- Product fit and protection
- Product placement
- Safety requirement
- Storage and space efficiency
- Handling and transportation
- Durability
- Sustainability and environmental impact
Once you’ve analyzed the visual appeal and functionality of your prototypes, you’ll know how effective your package design is as a whole.
By the time you’ve finished testing your prototypes, you’ll have a good idea of how effective your package design is as a whole. Then it’s back to iterating.
10 best packaging design software for every use case
Discover the best tools for 3D design, workflow management, and stakeholder approvals.
8. Iterate – improving your designs again
Take your learnings from the prototyping phase and use them to make your final packaging design even better.
As you start perfecting things like nutritional information or product instructions, you need to go over everything with a fine tooth comb. This is where file comparison software can be super valuable. It will automatically highlight text changes from one packaging design to the next. So you can easily verify edits and be confident that nothing has changed without you noticing!
You’re nearly there now, and it won’t be long before your finished package sees the light of day!
9. Approve – getting sign-off from your stakeholders
The end is in sight. But before your final product can be shared with the public, you need to get sign-off from all your stakeholders. After all, you want to be sure that you have everyone’s support and approval before you commit to printing.
To keep things moving and to get your package design over the line as quickly as possible, take a structured and streamlined approach to approval. That way, it’s easier to keep track of who’s approved what.
Here’s how Filestage can help you get your packaging design approved three times faster.
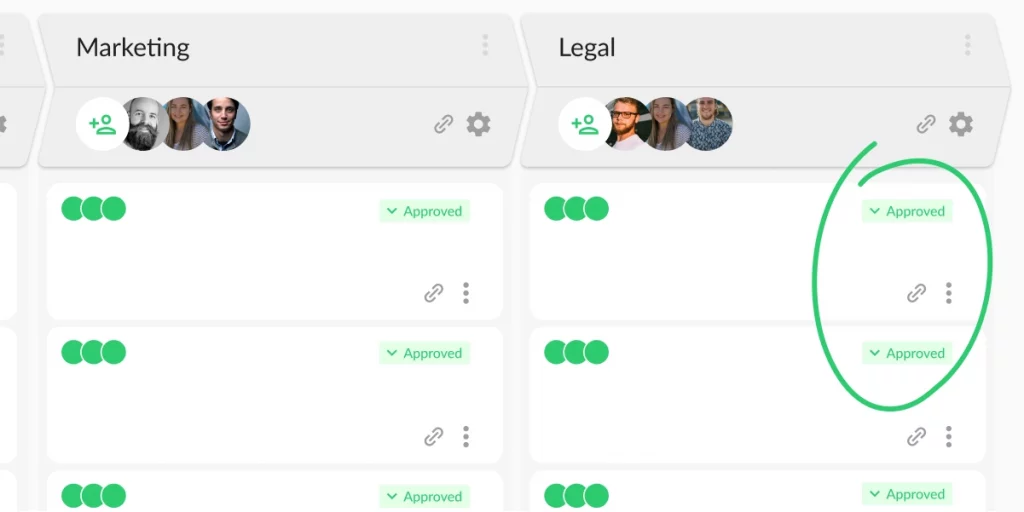
One-click approval
Your reviewers can choose between two buttons every time they give feedback:
✓ Approve
↻ Request changes
This instantly changes their status indicator to green or orange in your project dashboard, depending on their choice. So you can easily see who’s approved your designs, who you’re still waiting on, and what needs tweaking.
Automated reminders
Set up your review steps and due dates, then let Filestage take care of the rest. As the deadline gets closer, we’ll send automated reminders to any reviewers who still need to give their seal of approval. No chasing, no hassling, no worries.
Final design all signed off? High five! Now let’s get printing.
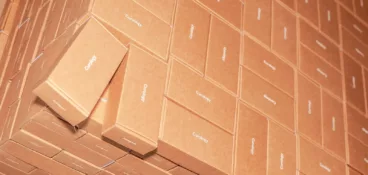
10. Print – preparing and printing your designs
Collaborate with a package printing supplier and they’ll help you to choose the most appropriate printing technique.
The most common techniques for package printing are:
- Offset lithography printing (also known as offset printing)
- Flexography
- Digital printing (also known as inkjet printing)
- Rotogravure
- Silkscreen printing
Before you send your design to be printed, you need to prepare the final print-ready files.
Most printers will ask for:
- The highest quality versions of your finished artwork
- Packaging dielines in vector format (usually an Adobe Illustrator (.ai), Photoshop (.psd), PDF, or EPS file)
- Pantone or CMYK color codes, so that everything looks exactly like you want it to you
Once the printing team has received everything they need, they’ll then set up their printing press or machine by installing the appropriate printing plates or cylinders, adjusting ink setting, and aligning the material so that everything comes out just right.
And once your packaging has been printed and finished, you’ll get your first glimpse of the final product in all its glory!
And now … It’s finally time for the public debut.
11. User testing – collecting feedback from real users or customers
User testing helps you to find out what your customers think about your new product packaging. Because ultimately, they’re the ones that matter.
You could send out surveys to your target group, host a focus group, and even offer an incentive to encourage more customers to participate.
Here are some example questions that will help you to gather valuable insights:
General impressions
- What was your first impression of the product packaging?
- What are your overall thoughts on the packaging design?
- Are there any specific elements or features of the product’s packaging that stood out to you?
- How does the packaging make you feel about the product?
Visual appeal
- Does the packaging catch your attention on a shelf or in online product listings?
- Are the colors, graphics, and imagery appealing and engaging?
- Does the packaging design accurately represent the product inside?
Clarity and information
- Is the product information (such as product name, features, and benefits) clearly communicated on the packaging?
- Do you feel well-informed about the product by reading the packaging?
- Is there any additional information you would like to see on this product’s packaging?
Branding and identity
- Does the packaging reflect brand identity and values effectively?
- Does the packaging differentiate the product from competitors?
Functionality
- Is the packaging easy to open, close, and handle?
- Does the packaging protect the product adequately?
- Does the packaging provide sufficient information about product usage or instructions?
Suggestions for improvement
- Are there any aspects of the product packaging design that you find confusing, misleading, or unappealing?
- Are there any specific changes or additions you would recommend to improve the packaging?
- Is there anything else you would like to share about your experience with the product packaging?
Use this feedback to identify areas for improvement. Over time you can refine your packaging design so that it meets the needs and expectations of consumers. Soon, your products will be flying off the shelves!
Final thoughts
I hope you’ve enjoyed learning about the process of designing product packaging, from briefing through to user testing.
If you’d like to see how Filestage could help you to collect feedback and get approval on your designs, start a free trial here.