
Getting fast and clear feedback on your work is the ideal situation, no matter your job role or industry. When you’re working on a design project especially, it can be a major task to give and receive feedback in an effective way that moves the project closer to successful completion. If you’ve ever been trapped in a cycle of endless back and forth image edit comments, you’ll know exactly what I mean!
But there’s a solution available that may just save your workflow – and your sanity. Image annotation tools can streamline the process of giving and receiving project edits. They remove blockers by providing an opportunity to give all stakeholders eyes on a project and to review and sign-off comments in real time.
Here’s what I’ll cover in this handy guide on how to annotate an image:
- Four free ways to annotate an image
- Why image annotation is so important
- Seven popular types of image annotation
- Popular use cases
Let’s get started with our four free ways you can start using image annotation today.
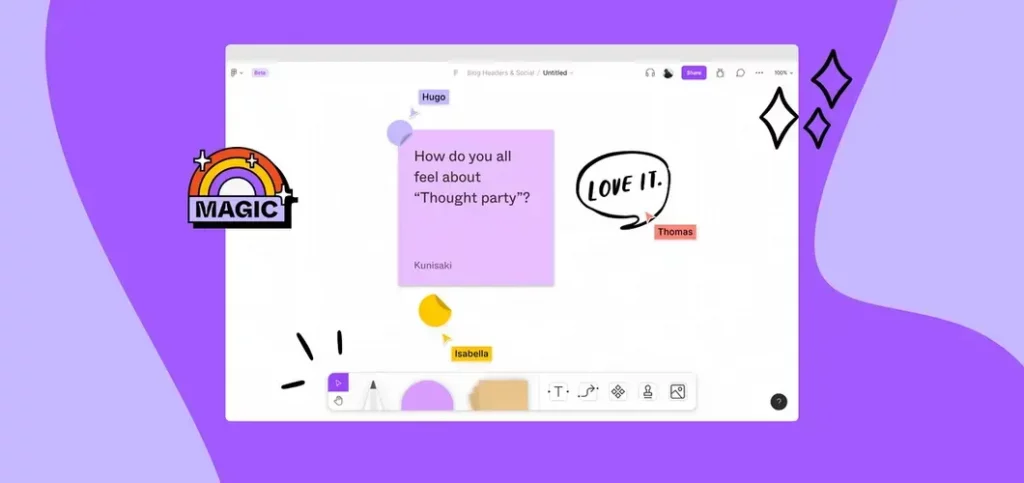
1. Draw on images and create post-its in FigJam
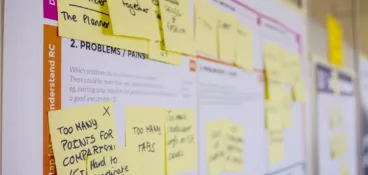
If you’ve ever found it difficult to create a workflow chart with multiple streams to visualize every step in a project, you’re not alone!
With FigJam, you can use their collaborative image markup tool to draw shapes, lines, and insert images and post-it notes directly onto a flow chart. You can also collect ideas and even host interactive feedback sessions.
As Figma’s popular digital whiteboard tool, anyone with permission to access the project can create and edit the fully customizable chart. Then each stakeholder can add annotations and more steps to a project in real time.
Here’s how you can use FigJam to annotate images in a few simple steps:
- Sign up to Figma and create a new FigJam board to access specific file templates
- Explore files which include the board, file toolbar and main tools and objects bar
- Add or import objects to your new board, such as post-it notes, images, or shapes
- Share your board with the relevant stakeholders to create a collaborative space for any project that requires timely annotation
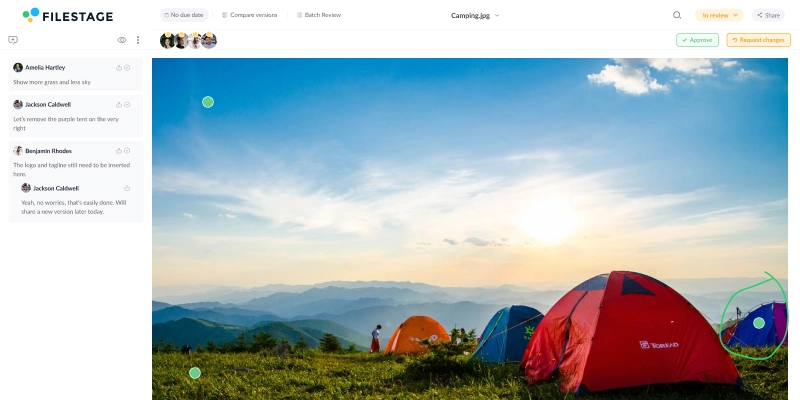
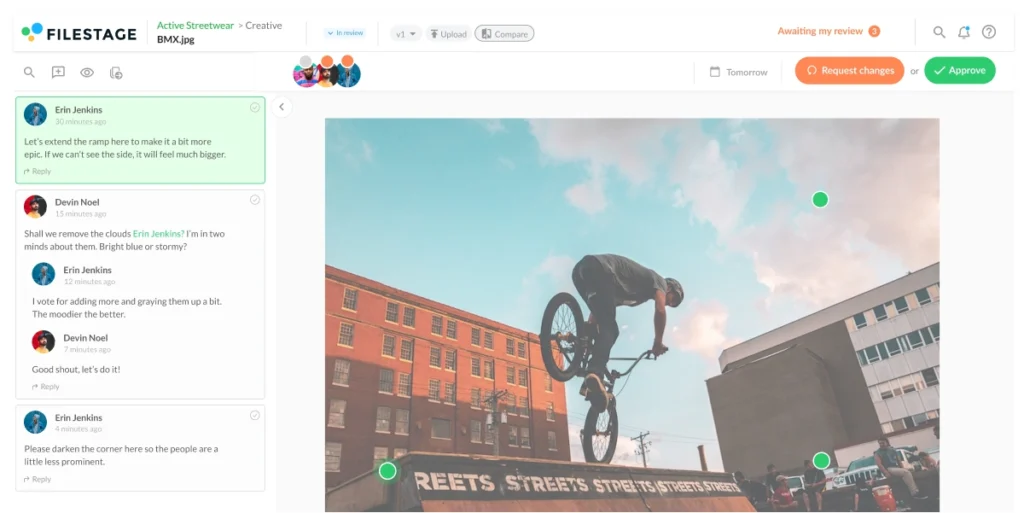
2. Add comments, markers, and annotations in Filestage
Next up is Filestage’s online annotation tool, which gives you an easy way to collect feedback across images, designs, and other file formats.
Multiple team members can invite unlimited reviewers to add comments, markers, and annotations – all in one visual feedback platform. This dramatically speeds up the approval process and keeps all feedback transparent and easy to access.
On top of that, you can compare versions of an image or design project side by side, including all the comments. And you can even set due dates and track review decisions to keep projects moving forward.
To get started, simply follow these easy steps:
- Sign up to Filestage and create a project
- Begin inviting team members to collaborate, leave design feedback, and approve files
- Paste in a URL of a site or upload an image file you wish to annotate
- Switch from ‘Browse mode’ to ‘Comment mode’ by installing the Google Chrome extension
- Start annotating by using comments and the freehand drawing, boxes, arrow, and line tools
Supercharge your image reviews
Manage every comment, version, and approval in one place with Filestage.
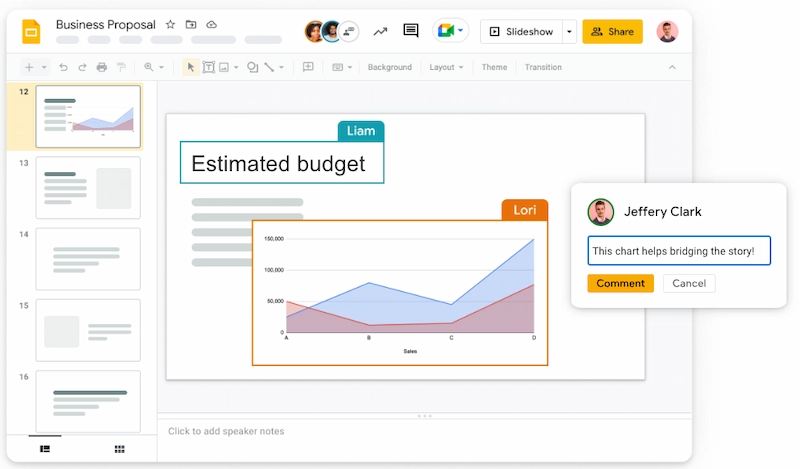
3. Add text boxes around your image in Google Slides
Working on a joint presentation can result in a messy minefield of multiple comments in the Notes section which can be difficult to follow and implement. Thankfully, Google Slides offers multiple ways to annotate an image online and directly in a presentation, including:
- ‘Scribble’ and highlight
- Add a text box around the image
- ‘Laser tool’ to point out specific sections on a slide
- ‘Pen tool’ to draw directly onto slide
Annotating in Google Slides is also useful for brainstorming or project ideation sessions. This feedback tool also allows you to add more context for the use of the image itself, as you can simply add labels with further explanation or references.
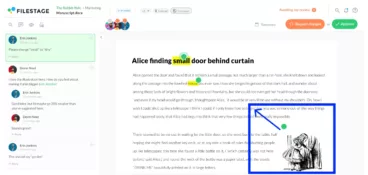
4. Annotate an image in Google Docs
Another free way to annotate an image is in Google Docs. Not only can you annotate a Google document with the Highlight function to add comments to a body of text, but you can also use the Drawing function to annotate images in the document itself. Utilizing the drawing tools can help to add more information and allows you to be more creative with your annotations.
With the drawing tool, you’re free to add various images as reference points to add visual explanations behind design elements. Different fonts can also be used to annotate an image to help clearly differentiate points from various editors of the document, or different edit versions.

Are you a Microsoft Word user? Check out our Word annotation guide.
Why image annotation is so important
You might be wondering what makes image annotation important, and what are the benefits for you and your work? Simply put, image annotations make feedback clearer, reducing miscommunication and frustrating rework. Clear annotation allows for easy collaboration on projects, real-time feedback, decreased rounds of feedback and edits, and it can also speed up the design approval process through visual representation of projects.
You may be used to the classic back and forth of email feedback, with seemingly endless rounds of edits and comments leaving you with a very long thread that’s difficult to keep up with.
But the typical way of sharing feedback over email can result in misinterpreted comments. This can slow down the review process and delay project approval. It’s simply harder to understand comments when they are separate from images.
For example, if a designer interprets feedback a certain way and the designs are published, it can cause reputational damage for brands and even result in work being pulled and reprinted – which adds cost.
This is why a content review platform with built-in image and design annotation tools can be the perfect way to bring a project together. It makes sure everyone involved is on the same page, literally and figuratively.
Seven popular types of image annotation
Now you’re aware of what types of online image annotation tools are available and why annotating images is important, let’s explore the most popular types.
1. Image classification
Image classification is the simple process of identifying all properties within an image. Annotations for image classification may come in the form of simple text labels describing the image itself or identifying objects within the image without localizing them.
Some teams run image annotation projects to give external partners everything they need to work with their content. For example, they can describe the different products in each annotated image and point out subtle differences that collaborators may not notice.
2. Object detection and recognition
Identifying objects within a design or image is a convenient way to bring attention to specific aspects of a design or image. You can draw a box around an object that you wish to highlight and create an accurate label for the object.
This form of image annotation tagging with object detection is often used to train machine learning models, such as surveillance systems. But it can also be utilized for a creative project to assign a label to each object.
3. Segmentation
With semantic segmentation, you are identifying and understanding what properties are in the image at a pixel level. This will aim to categorize pixels in the image to help determine which elements or regions of the image belong to which object or class, establishing a boundary between each. For example, classifying an image of a busy street, you would label the sky, road, buildings, and any people to partition any overlaps. But this annotation would not distinguish any specific objects within those regions.
You can also try instance segmentation which is a more granular approach. For example, instead of highlighting a group of people in an image, you can identify them as individuals rather than as overlapping elements of a crowd. This allows reviewers to differentiate more clearly between highlighted elements in a scene or image.
4. Comment markers
Comment markers can be used to allow annotators to leave feedback notes or provide further context. They can also provide instructions or even explanations as to why they have made specific design choices or how their design meets the brief guidelines. Instructions can be left as a comment marker to provide further guidance and better understanding on the next round of edits, or to clarify any ambiguous elements.
5. Freehand drawings
The manual creation of drawing onto an image can be an efficient way to establish extra image annotation without boundaries. Complex shapes may not fit into the standard box shape when highlighting, so freehand drawings can work well alongside comment markers to establish further feedback opportunities.
The use of freehand drawings in image annotation is often used in the image segmentation process where there may be complex shapes to highlight that do not fit into typical geometric forms such as rectangles or squares.
6. Line tool
A straightforward line tool allows the annotator to draw a line between whichever design elements they are highlighting for feedback purposes. Drawing a line between two points can also allow the annotator to connect two elements in an image and provide feedback which relates to both properties. This annotation tool is simple but effective.
7. Bounding box tool
This is the process of annotating an image by using a bounding box which is manually drawn around a section of an image or feature within the image. The boxes can then be labeled with further context or instructions as per the preferred feedback.
The bounding box tool is commonly used in machine learning models, especially in the use of surveillance systems and in the retail industry, as the technique is well suited for the correct detection of various objects in an entire image.
Three popular use cases for image annotation
As you can tell by now, the practice of image annotation works to improve workflow and limit feedback loops in many professional situations. Now, let’s take a look at three most common image annotation use cases below.
1. Creative agencies
To leverage the best creative strategy with all stakeholders, creative agencies use image annotation to enhance visual content representation and to provide clear information on creative decisions made per project.
For example, collaborative mood boards can be annotated by multiple users as a starting point for a project. This can work well to get both client and agency working from the same page right from the early stages.
2. Designers and photographers
Freelance designers and photographers will be no stranger to lengthy feedback loops of edits between themselves and their clients. This is where the use of online image annotation tools come into their own, allowing for direct and quick feedback with the options for viewing previous edits, and even providing reference points for design options.
A designer can annotate creative projects or images online to streamline their workflow management. They can also utilize subsequent fast feedback in order to successfully fulfill their various client requirements – all while cutting sign-off time!
3. Remote teams
Within remote working teams, image annotation can facilitate a smoother feedback process and improve clarity of communications across collaborative projects.
Remote user management can be made easier by online annotation tools. Annotations such as comment markers and freehand drawing options enable multiple team members to provide their thoughts on image components and versions while giving effective feedback.
This works particularly well when remote team members working on a project may be based in different time zones as it can reduce waiting time for feedback and sign-off comments.
Final thoughts
When time is precious, it’s crucial to consider the various tools available out there to help you.
A design approval tool can reduce the pressure of your workload and improve workflow pathways when there are so many people involved on one project. After all, good communication is key to a successful project that is completed on time, to the brief, and to budget.
Fast and clear feedback due to the use of image annotation undoubtedly aids the creative process, whether that’s across multiple teams or simply between yourself and a client.
An effective creative feedback process allows for everyone’s comments to be seen and understood. Image annotation tools, such as the ones mentioned in this guide, will provide the space to collaborate in one place, outlining transparent thought processes and next steps for any project that you’re a part of.
To explore the benefits of online image annotation tools and see how you can cut approval time by 30%, why not start right here with Filestage? Start a free trial →