
It’s never been easier to make, share, and upload videos online. You can do it. I can do it. Heck, my 80-year-old Grandma can do it. And while she might not be your biggest competitor, there are countless other content creators out there who are just waiting to steal your precious views.
But don’t worry, we’re not going to let that happen. Because in this guide, we’re going to show you how to annotate video with extra info, added pazazz, and more. Whether you’re making a simple YouTube video, creating content for a startup, or working as a video editor for a full service agency, keep reading to get the latest tips, tricks, and practical steps that will make every video clip pop, everytime..
Before we get into it, here’s a quick snapshot of what’s to come:
- The advantages of video annotation tools
- Picking the right tool
- Annotating videos with Filestage
- Best practices and top tips
Supercharge your video review rounds
Get feedback and annotations on your video edits with Filestage.
The advantages of video annotation tools
I could dedicate this entire article to the advantages of video file annotation. But we’ve got work to do, like actually annotating your videos. So instead, let’s look at a few of the biggest benefits that come from enhancing your video content with video sharing platforms and online annotation tools.
1. Improved user experience
Valuing your audience’s time and energy is everything. Whether you’re making a YouTube video tutorial to help people learn Cantonese or simply selling a new product, adding things like comments, captions, and subtitles is a great way to increase the quality of your content and make it accessible to a larger, more diverse audience.
2. Clear product and service information
You can use annotations in sponsored videos, advertisements, and product demonstrations to highlight specific features and provide people with extra information. This increases potential customers’ confidence in your product for higher conversion rates.
3. Machine learning
Video annotation plays an important role in training machine learning models for computer vision tasks. With annotated images, video, frames, and segments, we can build more accurate algorithms for tasks like object detection, tracking, and action recognition.
4. Keep up with your viewers
A solid video annotation platform can help generate and collect valuable data insights for businesses and content creators alike. By taking a close look at user interactions and behaviors in your annotated videos, you can make more informed, data-driven decisions and content optimizations.
If you want to learn more about how to speed up your overall video production process, make sure to check out the video:
Picking the right tool
Video annotation tools are there to make your life easier and make your visual projects more engaging, informative, and accessible. But to annotate your video files successfully, you first need to pick the best video annotation tool.
Of course, your annotation tool checklist will vary a bit depending on your specific video project. But here a few key features to look out for:
- Multiple annotation types – being able to label and annotate different aspects of your video is made a lot easier with the help of segmentation and temporal annotation features.
- A user-friendly interface – you can save yourself a whole lot of time and effort by simply working with an easy-to-use, intuitive platform.
- Easy sharing – being able to seamlessly share videos privately with your wider team as well as external reviewers is another major time saver.
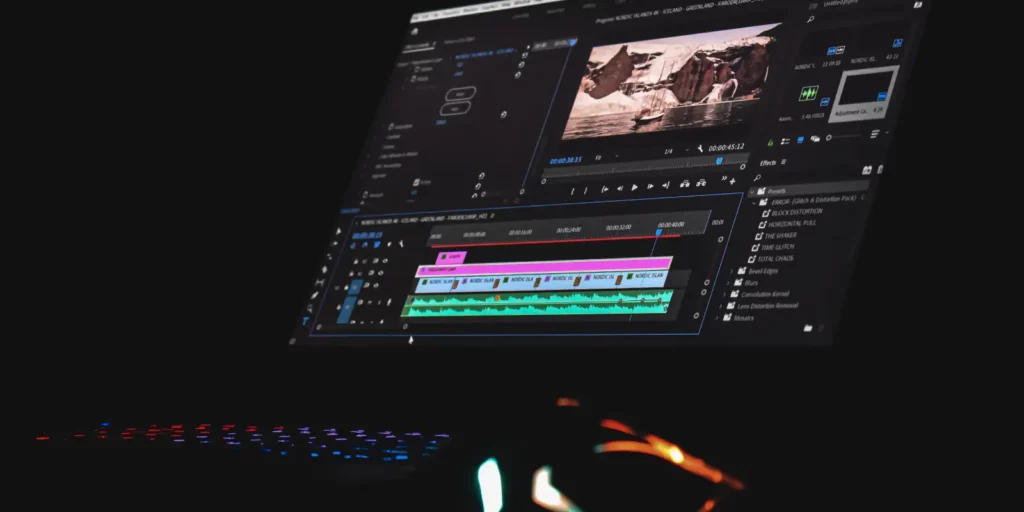
- Integration – nobody wants to have to jump around between multiple different platforms. Find a video sharing platform that works with your existing process and connects with frequently used tools like Adobe Premiere Pro.
- Project tracking – following the progress of your projects from start to finish can save a lot of unnecessary hassle, both on your current task as well as future projects.

Annotating videos with Filestage
If you’re looking for a video annotation software that ticks every box in the checklist above, Filestage is a great choice.
This cloud-based video review platform is perfect for busy creative teams, agencies, and production studios who value collaboration and efficiency when creating every type of content. And it offers a robust set of features designed to streamline the video annotation process.
Filestage is particularly useful for video projects that involve multiple stakeholders, remote teams, and high-volume content.
With Filestage, you and your team can will get to benefit from things like:
- Real-time video editing collaboration which gives your team the ability to annotate videos simultaneously and provide instant feedback as you go.
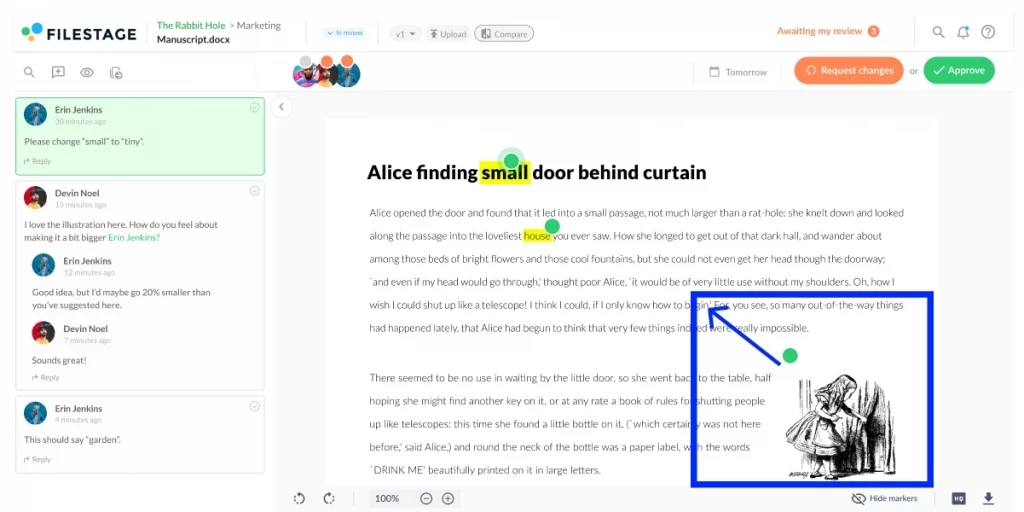
- Extensive annotation features for highlighting, providing detailed feedback with specific time stamps, as well as drawing on video and adding comments.
- Seamless integration with your favorite content creation tools like Slack, Adobe Creative Cloud, and Trello.
Adding screen annotations to your video content with Filestage really is as easy as one, two, three. With that said, here’s our quick three step guide to help you get started. This next section will show you how to sign up for our free annotation tool, import your videos, and add those all-important annotations for a seamless online video collaboration.
So, let’s go.
Step 1: Sign up to Filestage
The first thing you need to do is sign up for a video annotation tool. While there are endless options out there to choose from, you can save yourself the whole process of trial and error by simply signing up for Filestage with access to our Free plan. This software allows you to create projects where you can:
- Share unlimited videos (and a wide range of other file types)
- Invite unlimited team members to collaborate with
- Invite unlimited reviewers to add feedback and give approval
- Add unlimited comments and annotations
And it gets better. When you sign up, you’ll also get to try out our Professional trial for seven days. This plan gives you access to more advanced features like custom branding, review reports, and automations.
Supercharge your video review rounds
Get feedback and annotations on your video edits with Filestage.
Step 2: Upload your video
Once you’ve signed up, all you need to do is click “Create project” and give it a name. Then, from your project dashboard, simply hit “Upload file” to add one or more videos to your project. It’s also worth noting that if you need to create other kinds of content, you can also use Filestage to share designs, annotate websites, and review and approve other file types, too.
You can import your videos by either uploading them directly from your device with the drag and drop feature, or paste in a URL if the video is already somewhere on the web. After that, you’re ready to start annotating your video content. You can invite new members of your team at any point in the process for an optimized workflow.

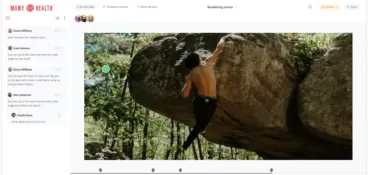
Step 3: Start annotating
When you’re ready to create an annotation or comment on particular frames of your video, simply click on the video.
This will pause your video, create a marker, and save a timestamp – then you can add:
- Freehand drawings
- Boxes
- Arrows
- Comments and subtitles
Filestage makes it super easy to annotate your videos from start to finish while working remotely, which is essential when you have multiple team members working together on one project. You can even upload attachments to your comments for reference and inspiration, keeping all your related materials in one place.
Best practices and top tips
There are lots of tips and tricks to help you master the art of video annotation. But let’s take a look at some of the key things you’ll want to keep in mind when getting started.
- Define your annotation goals – There are many different use cases for annotating videos, from increased user engagement to machine learning. So it’s important that you know what you want to achieve with your video annotations as this will determine the steps you take along the way. You also want your entire team to be on the same page for consistent, relevant feedback and results.
- Keep your annotations concise – At its core, video annotation is about making the content more accessible to humans and machines. So it’s best to use short and clear text that quickly conveys information without distracting from the video content itself.
- Think about annotation placement – The last thing you want your annotations to do is block important visual elements in the video. That’s why when you add annotations to your content, balancing visibility and minimal interference is crucial.
- Time your annotations accurately – It goes without saying that poorly timed video annotations are not a good look. Take the time to check that all your annotations correlate with the relevant content, action, or event in the video. This sounds like an obvious step, but you’d be surprised how easy it is to miss inconsistencies. Especially when you’re working to tight deadlines.
- Consider different screen sizes – It’s good to note that your videos are most likely going to be viewed on different devices with varying screen sizes. Testing your annotations on different screen sizes will ensure they’re legible and appropriately placed for everyone viewing your videos.
FAQs on how to annotate video
How do I annotate a video?
The easiest way to annotate a video is to use a dedicated tool. The software you choose will depend on your end goal.
Let’s say you want to annotate video content as part of the review process (rather than noting down timecodes and sending screenshots). In this case, your best bet is video review software.
You can use a tool like Filestage to annotate videos with feedback, comments, and suggestions. Simply follow these steps:
- Create a video project in Filesage
- Upload your content (Filestage works with all video file types)
- Invite reviewers to leave feedback
- Reviewers can add annotations and leave comments directly on video assets
How do I add notes to videos?
You can easily annotate videos with the right software. Start by choosing a video annotation tool that matches your goals. Do you want to add annotations to enhance educational content? Or maybe you’re looking for a way to annotate videos with revision requests to speed up the approval process.
Once you’re clear on your goals, choose the solution that covers your needs. I’d recommend opting for a tool that supports multiple video file formats.
Each tool is different, but the process usually looks something like this:
- Import your video into the tool
- Use the in-built text annotation features to add notes at specific timestamps
- Double-check your notes are clear
- Export the video with your annotations
How can I set up a video annotation workflow?
An efficient video annotation workflow can save you time and unnecessary frustration. Here’s how to set one up with Filestage to speed up your approval process:
- Create a new video project
- Build custom reviewer groups to make sure the right stakeholders provide feedback at the right stage of the process
- Invite reviewers to use the annotation features to leave comments and revision requests directly on top of videos
- Turn those comments into to-do lists and resolve comments as you make changes
- Manage all feedback and video versions from one central hub
Final thoughts
Video annotation is a great way to help you create visual content that stands out from the crowd in today’s highly competitive and ever-changing digital world. Hopefully this article has given you a good insight into how to easily and efficiently annotate a video with Filestage. Now, all that’s left to do is start a free trial today →