There are around 1.13 billion websites on the internet in 2023. That’s more than three websites for every single person in the United States. But, the question is, how much of that is valuable?
According to Forbes, 88% of online users won’t return to a site after a bad experience. And who can blame them? With so much out there to explore, people don’t have time or space for garbage.
Which brings us to your website and the importance of website annotation tools to make sure it hits the mark!
The two biggest reasons to start using website annotation tools
We’ve already talked about the ocean of content out there on the web. But that’s just one part of the problem.
The truth is that your audience is changing – and fast. Apps like Instagram and TikTok are rewiring our brains, making us less patient and more demanding when it comes to content.
If we don’t get it or like it, we move on to something else. Because no matter what product or service your website offers, you can bet that there are a dozen other websites out there that can give your visitors the same thing.
Let’s dig into this a bit more by looking at the two biggest reasons to use website annotation tools.
1. Give users a smooth experience that keeps them on your website
The key to keeping users on your website or web page is giving them a smooth experience. I’m talking, like, Barry White smooth.
First up, your page needs to load at a lightning-like pace. On average, website conversion drops by 4.42% with each additional second of load time between zero and five seconds. That’s a lot of lost revenue right there!
You can use tools like Pingdom to monitor and optimize your website speed. But with website and screen annotations, you can get super specific by pointing out things like:
- Images that take the longest to load
- Components that glitch before appearing correctly
- Menus that don’t work as intended
- Broken contact and signup forms
- Inconsistent or non-responsive hover states
- Dead links and calls to action
- HTML code that appears within the copy
By working with your team to spot and fix all these issues, you’ll increase the chances of users sticking around and converting.
2. Make the experience so great that users want to take action
Once you’ve nailed the basics of a smooth website experience, you’re ready to focus on the aesthetics.
Research from Forbes shows that 38% of users won’t engage with a website if its layout is unattractive. And, to make matters worse, 57% of users won’t recommend a business with a poorly designed website.
In an age of influencers and social media virality, word of mouth can make or break your business. So you need to make sure your website design jumps off the screen and resonates with your audience.
Here are a few questions you should have in mind when creating your web annotations:
- Is it clear who we are and what we’re offering?
- Will the copy and visuals above the fold immediately grab the attention of our target audience?
- Do we have the right balance between copy and imagery throughout the page or site?
- Is the path to purchase clear and easy to follow?
- Is it easy for users to find answers to their questions along the way?
Of course, these are all pretty generic. And depending on whether you’re creating a SaaS website, e-commerce page, or blog, you’ll have a bunch of other things to consider too!
The main use cases for website annotation tools
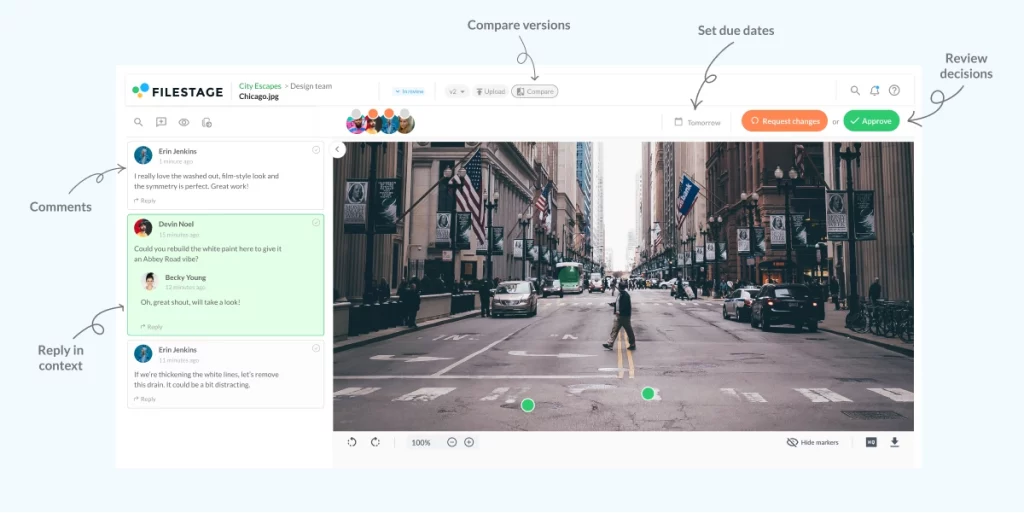
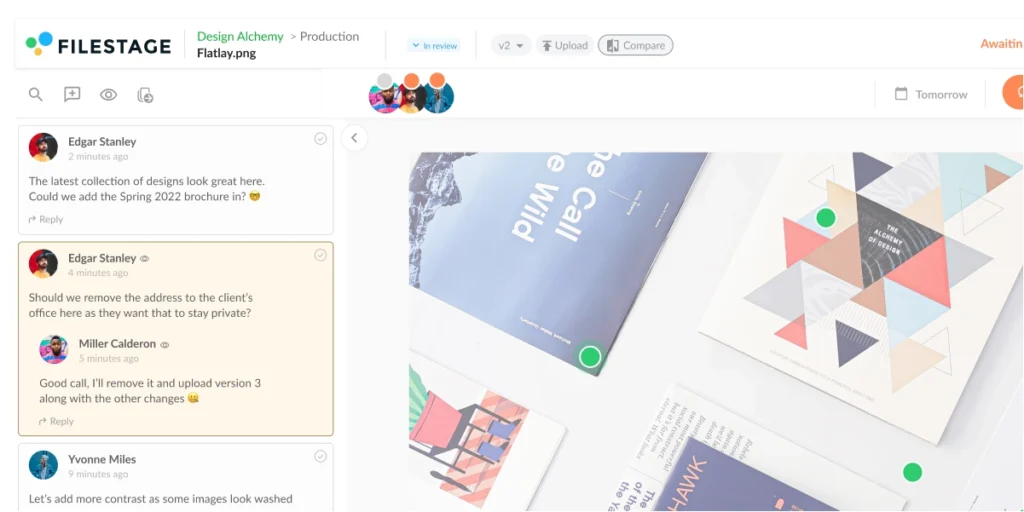
Website annotation tools allow you (or anyone, for that matter) to add notes and visual feedback right on top of your content.
From solo creatives to brands and agencies, let’s look at a few of the main use cases for a website annotation tool.

Reviewing a new website, page, or component
The first and most obvious use case for annotation apps is for reviewing new website content with teammates and clients.
You can import a URL from staging, production, or even a prototype link from your web design tool. Then you and your reviewers can add collaborative website annotations to pick out bugs and iron out the creases.
Need to review videos and animations before they go live on your website? Check out our roundup of the best tools for video annotations.
Running user experience tests with users
I’ve already spent a bit of time talking about the importance of a great user experience. Well, one of the best ways you can achieve that is by letting users annotate your website directly.
This can help to illuminate questions or challenges you would never think about, like:
- I have no idea what this part means
- What happens if I click this button?
- How do I check the returns policy?
With the best website annotation tools, you can create a dedicated review step for user testing – allowing users to share website feedback when you feel you’ve covered everything else.
Auditing an existing website or digital product
One of my favorite use cases of website annotation is for auditing websites and products that are already live.
In fact, in true Inception style, I used Filestage’s website annotation tool to review our own product as part of a tone of voice audit. I could navigate between pages in the app, creating comments and annotations as I went. And if our product designers and developers had any questions, they could tag me in the comments – keeping everything in context.
It was a dream!
Reporting bugs and usability issues
Bugs. Glitches. Rage clicks. Whatever issues you’re having on your website or in your product, you need a way to report them.
Sure, you could capture a few screenshots, write out a description, and upload it to one of the project management tools. Or record a Loom to explain what’s up. Or you could use an annotation tool to literally show your designers and developers the problem.
Annotate your website with ease
Get faster and more accurate feedback on top of your website with Filestage.
How to annotate a website and add comments in three steps
Annotating websites is easy when you know how. Over the next three steps, I’ll show you how to sign up for a free annotation tool, import your website, and start adding annotations.
Let’s dive in.
1. Sign up for Filestage (it’s free)
The first thing you need to do is sign up for a website annotation tool – we can’t rely on email or PowerPoint for this one!
Sign up for Filestage and you’ll get access to our Free plan. This allows you to create two projects, where you can:
- Share unlimited websites (and a wide range of other file types)
- Invite unlimited team members to collaborate with
- Invite unlimited reviewers to add feedback and give approval
- Add unlimited comments and annotations
- Create web, image, document, and video annotation
On top of that, you’ll also get access to a Professional trial for seven days. This gives you access to more advanced features like custom branding, review reports, and automations.
Check out the video and see all website annotation capabilities in Filestage, first-hand:
2. Paste in your URL
Next up, paste in the URL that you want to annotate.
Here’s how:
- Go to the website you want to annotate
- Select and copy the URL in your browser’s address bar
- Go to Filestage and click “Upload file” followed by “Import website”
- Paste your URL into the box
And there it is – your website, all set to be annotated right there in your browser!
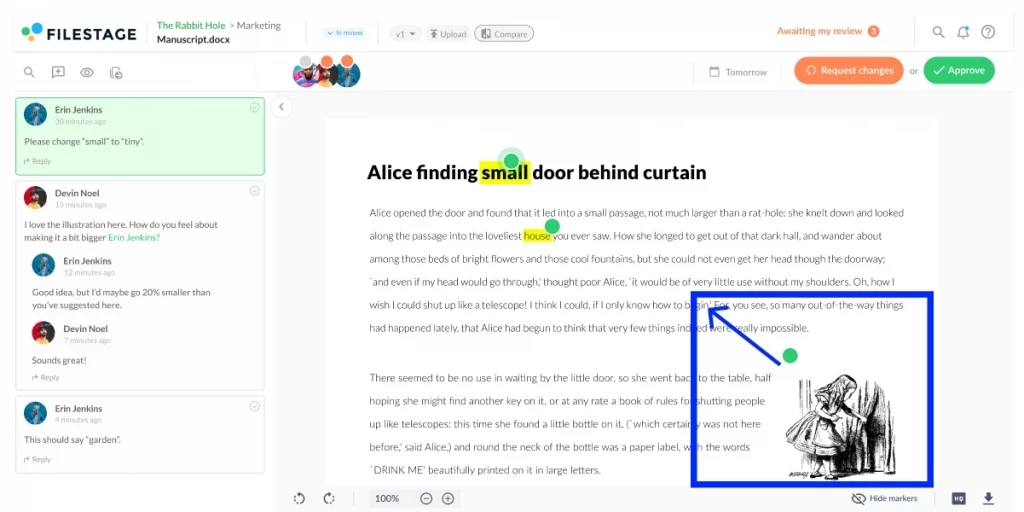
3. Start annotating
Now that your website is living and breathing in Filestage, you’re all set to start annotating – and invite your teammates or reviewers to do the same.
When you first enter the website viewer, you’ll be in “Browse mode”. This lets you navigate the website as if you were doing it in your browser.
Then, when you’re ready to create an annotation or comment, click “Comment mode” at the bottom.
This will capture a screenshot of the content so you can add:
- Freehand drawings
- Boxes
- Arrows
- Lines
You can even upload attachments to your comments, helping to keep everything related to your website design process together in one place.
How and why you should annotate web pages for different devices
Over the last eight years, the share of traffic coming from mobile has grown from 31% to a whopping 58%. So it’s no surprise that “mobile-first” is one of the biggest buzzwords in web design – and has been for a while.
But that’s not enough.
You can’t just make your mobile design look pretty in Figma, hand it over to your developers, and think your work is done.
Here’s why. Users are 67% more likely to make a purchase if the website is mobile-friendly. So extend that adage to “mobile-first development”, reviewing your content on desktop, mobile, and tablet to make sure it looks the part.
To help with this, Filestage lets you view and annotate your web page in three different viewports:
- Responsive – how your website will look based on your current browser size
- Mobile – 414px x 495px
- Tablet – 768px x 1024px
What websites, web pages, and other HTML can you annotate?
Throughout this article, I’ve talked a lot about how you can annotate websites or a specific web page using tools like Filestage.
But that’s just the beginning.
Let me put it this way: if it can be shared as a URL, it can be uploaded to Filestage to be annotated and reviewed.
Here are a few other things you can review in Filestage using our live websites feature:
- Google Docs and other live document files
- Dynamic content like interactive maps
- 3D models or 360° images and videos
- Surveys from tools like Typeform, Google Forms, and SurveyMonkey
- Interactive prototypes from tools like Figma, Adobe XD, Invision, and Sketch
- iCloud files like Keynote, Pages, and Numbers
- Online articles on your blog or Medium
- Live technical documents like your privacy policy or terms and conditions
But why stop there? If you’re also in the business of creating interactive HTML content, you can use Filestage to annotate that too.
This includes things like:
- Banner ads
- Dynamic display ads
- Emails
- E-learning content
- Animations
All you have to do is compress your HTML files as a .zip, then upload them to your project and start annotating!
What other file types do website annotation tools support?
Chances are that, if you’re in the business of creating web content, you also need to review other files from time to time.
One of the things that makes Filestage the best website annotation tool for brands and agencies is its versatility.
So as well as reviewing your latest web page, you can share and collaboratively annotate videos, images, documents, and audio files.
Here’s a full list of all our supported file formats:
- Video files: MOV, MP4, 3GP, AAC, AVI, FLC, MPEG-2, WMV, MXF
- Images: JPG, PNG, TIF/TIFF, AI, PSD, SVG, GIF, EPS, WEBP, NEF, CR2, DNG, ARW, HEIC, TTF, PSB
- Documents: PDF/X, DOC (Microsoft Word), DOCX (Microsoft Word Open XML), XLSX (Microsoft Excel Open XML), PPTX (Microsoft PowerPoint Open XML)
- Audio files: MP3, AAC, WAV
10 things to look out for when annotating web pages
When using web annotation tools to review web pages, it’s important to have clear criteria in mind.
Depending on your role, there will be certain criteria that you should focus on more than others. For example, designers should be focused on design consistency and hierarchy, while SEO specialists should be focused on – you guessed it – SEO.
But since I have no idea what your role is and what type of website annotations you’re expected to provide, I’ll give you the long list!
Here are the 10 key things to look out for in web annotation tools.
1. Design consistency
Take note of your website’s design consistency. Look for elements like a cohesive branding identity, consistent typography, color schemes, and a clear visual hierarchy.
Consistency in design creates a more polished and professional look that keeps users on your page. And, like I said at the top, that’s the first hurdle in getting them to convert!
2. Responsiveness
Like I mentioned earlier, be sure to test how the website responds across different devices and screen sizes. Check if it looks and functions well on desktops, laptops, tablets, and mobile devices. And try that snap-to-side thing on Windows too to see how it looks in a narrower browser window.
A responsive design makes sure users can access and enjoy your website regardless of the device they are using.
3. Navigation and user flow
Evaluate the website’s navigation structure and user flow. Consider how easily users can find information, move between pages, and complete desired actions. Let’s take an e-commerce site, for example. If they make it to the checkout page, how easily can they find out if you offer free delivery and returns?
Look for intuitive navigation menus, helpful breadcrumbs, and clear calls-to-action that guide users throughout their journey on the website.
4. Content readability
Pay attention to the readability of the website’s content. Look at factors like font choice, font size, line spacing, and paragraph length. In general, you want a nice high contrast between your text and background colors so that, even when small, it’s easy to read.
Where possible, use headings, subheadings, and bullet points to break up the text and make it easier to digest. And, if you need help spotting exactly which parts are too hard to read, try the Hemingway Editor.
5. Visual hierarchy
Assess how the website establishes a visual hierarchy for its elements. Look for effective use of font sizes, colors, spacing, and visual cues to direct users’ attention to important information.
What should they see first – the headline or the image? Then where should the eye go next? A well-structured visual hierarchy helps users quickly identify key messages and navigate through the content.
6. Performance
Consider the website’s performance in terms of loading speed and responsiveness. Test how quickly the pages load and whether any delays or performance issues occur. A fast and responsive website makes sure that users don’t get frustrated waiting for content to load and can smoothly interact with the site.
7. Accessibility
Keep in mind the accessibility of the website for users with disabilities. Check if features like alt tags for images, proper heading structure, keyboard navigation support, and sufficient color contrast are implemented. Making the website accessible ensures that everyone can access and engage with its content.
8. Forms and interactions
Review any forms or interactive elements on the website. Check if the forms are easy to understand and fill out, providing clear instructions and helpful error handling. Test interactive features like dropdown menus, sliders, or accordions to make sure they function smoothly, enhancing user interaction.
9. Browser compatibility
Test the website across various web browsers and versions to ensure compatibility. Check if the website displays correctly and functions as intended in popular browsers like Chrome, Firefox, Safari, and Edge. Address any issues that arise to ensure a consistent experience across different platforms.
10. SEO considerations
Evaluate the website’s search engine optimization (SEO) aspects. Look for proper meta tags, descriptive URLs, keyword usage, and optimized headings that align with relevant search terms. Optimizing the website for search engines helps improve its visibility and increases the likelihood of attracting organic traffic.
Final thoughts
In a world of low attention spans and unlimited content, you need to deliver the best experience possible to keep and convert your users.
With a website annotation tool, you can import any URL, invite your teammates and reviewers, and add annotations collaboratively.
But that’s enough talk. Sign up to Filestage to see it in action →