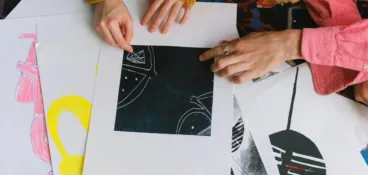
The digital world we live in today made graphics part of our everyday language. That resulted in 55% of companies using creative graphic design to communicate with customers, 24% of them to drive engagement on social media, and 19% internally.
Yet, so many companies still struggle to create an efficient graphic design process for their communications.
Here is the eight–steps graphic design process:
- Design brief – setting out the goals and strategy of your design
- Research phase– learning about the market or users you’re designing for
- Concepts – brainstorming ideas for your designs
- Concept development – polishing and refining your ideas
- Design review – getting feedback on your design ideas
- Iterate – improving your designs and collecting more feedback
- Approve – getting sign-off from your stakeholders
- User testing – collecting feedback from real users or customers
Let’s go through each step of the creative design process, and look at how you can optimize them.
1. Design brief – setting out the goals and strategy of your design project
The first step of your design workflow is the design brief. This will be the cornerstone of your project, setting your digital design process up for success.
Here, you pre-define goals and strategies for executing your design project. It requires a lot of details and straightforward communication to do it right.
This document should be no longer than two pages and communicate the vision and key criteria for the project.
How to optimize the creative brief for your graphic design process
A bad brief can cost you time, money, and even your reputation. Yet, so many people neglect the importance of the brief and turn it into a phone call, a short meeting, or worse, a message on Slack or Microsoft Teams.
To optimize your creative brief, consider using design collaboration tools like Google Suite (Docs, Sheets, or Forms, depending on the brief type you’re creating). This way, you’ll be able to work together with your client or a teammate on essential aspects of the design.
2. Research phase – learning about the market or users you’re designing for
Like with everything else in the world, good research is half the work. Learning about the market, competitors, and the people consuming your design will make your job much easier.
Plus, good graphic design research can guide you in some new directions and yield great inspiration that will benefit you later in your design workflow.
How to optimize your design research process
Besides simply looking up your competitors, your design research process could use more extensive analysis.
Here’s how you can up your research design game:
- Come up with some key criteria to measure your competitors
- Chat to your competitors’ customers to see what they like and dislike
- Read reviews to see what people think of the competition
- See how your competitors’ look and feel on social media
The list goes on! But with these few steps, you’ll already have a great foundation to start designing.
3. Concepts – brainstorming ideas for your designs
Pen and paper or an online whiteboard – it’s time to kickstart the create part of your design workflow. This is where you can dream up as many ideas as possible. Brainstorming includes inspiration, colors, emotions, mood, images, and everything else that might contribute to your design.
Invite your colleagues or clients to throw their ideas in the mix and create some truly amazing designs.
How to optimize your creative process for graphic design
Organizing a live brainstorming session might take up a lot of time and complicate things when people aren’t in the same office or don’t have similar schedules.
Here are a few graphic design project management software you can use to organize asynchronous yet effective brainstorming sessions:
- Google Docs – its collaborative nature allows everyone to pitch in ideas whenever they want to. Add comments, attach images, ideas, and links, or add to someone else’s idea, and round up the conversation.
- Canva – this highly visual tool allows you to create a moodboard and have your collaborators comment on it.
- Miro – this online collaborative whiteboard platform is designed to help teams work together on projects from anywhere. You can create brainstorming boards and allow everyone to add their ideas.
4. Concept development – polishing and refining your ideas
Once the brainstorming is done, and everyone is set on the general idea for the design, it’s time to polish all the details. This is the stage where you can really show off your skills to create something that’s both beautiful and functional.
How to optimize the design development process
Here’s some inspiration to help you optimize your design development process:
- Become a mad professor – try a wide range of colors, layouts, and styles until you land on something you’re happy with.
- Keep your mockups – it’s tempting to delete things you don’t like as you go, but you never know what could come in handy later.
- Give it the overnight test – sleep on your ideas so you can look at them tomorrow with fresh eyes.
- Ask people for feedback – more on that in the next step!
- Use AI tools for graphic design – create better, on brand designs in less time with powerful AI tools
5. Design review – getting feedback on your design ideas
A design review is a process of getting structured and meaningful feedback on a piece of design.
During the design review stages, designers present their ideas to all their stakeholders and get feedback on how they can be improved. By online proofing your graphic designs, you’ll get different perspectives from various colleagues, helping you to create the best design possible.
Hate missing feedback on your designs?
Learn how to cut human error from your approval process and deliver high-quality content, whoever’s creating it.
How to optimize the design review process
One of the best ways to optimize your creative design review process is by implementing a design approval software for collecting and organizing everyone’s feedback. It’ll help you cut time spent chasing everyone for feedback and make it easier to improve your designs.
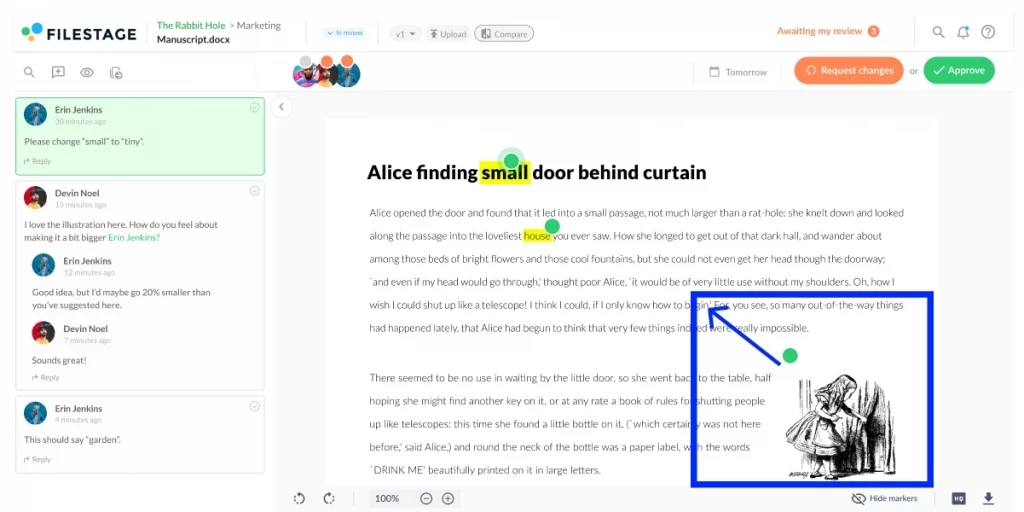
Here are a few ways Filestage makes it easy to review graphic designs:
- Annotations – draw on the content to add clarity to your comments
- Attachments – share references or important files like fonts and logos
- Highlights – select specific words and sentences that need editing
- Strikeouts – select which parts of a document you want to be deleted
6. Iterate – improving your designs and collecting more feedback
Every piece of design requires multiple review stages from different stakeholders until it’s ready for publishing.
But iterations can be slow and draining while waiting for everyone to review your design. In the meantime, you and your reviewers can get lost in the sea of design versions, making the whole process even more confusing.
For everything to run smoothly without frustration, it’s essential to make giving and receiving feedback as easy as possible.
How to optimize the design iteration process
The good news is that design review tools have come a long way in improving the iteration process!
Gone are the days of pulling up two windows and a bunch of old emails to collect and implement all client feedback.
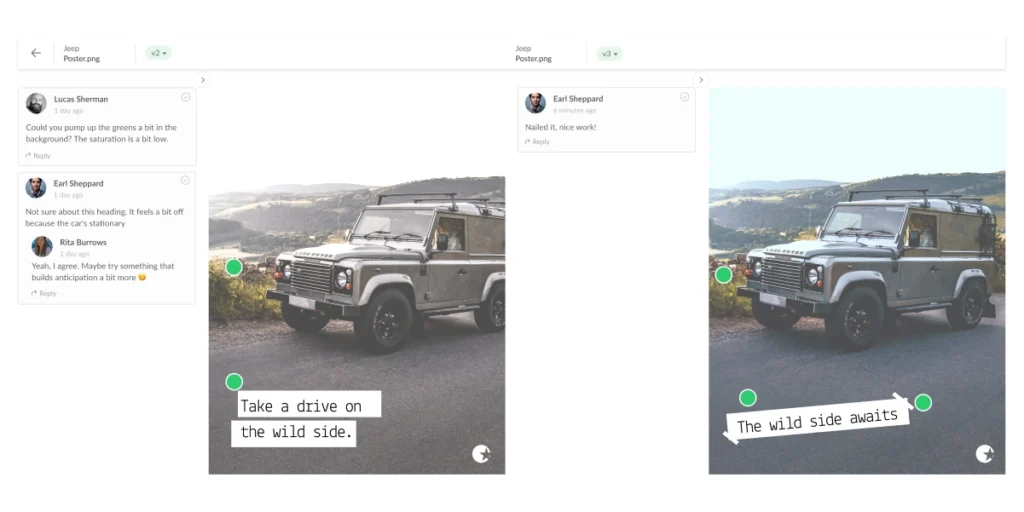
Here are three ways Filestage makes design iteration easier:
- Compare two versions of your design side by side, including all the comments
- Make sure everyone knows which version is the latest
- Hop back to previous versions and feedback in seconds
By giving your reviewers a more convenient way to review your designs, you’ll make the iteration stage of your digital design process more fun and effective for everyone. Check out our full guide on design version control to learn more.
7. Approve – getting sign-off from your stakeholders
At the end of the day, all your stakeholders need to be on the same page about your final design before it can see the light of day. But sometimes it’s impossible to have your design approved in one or two steps.
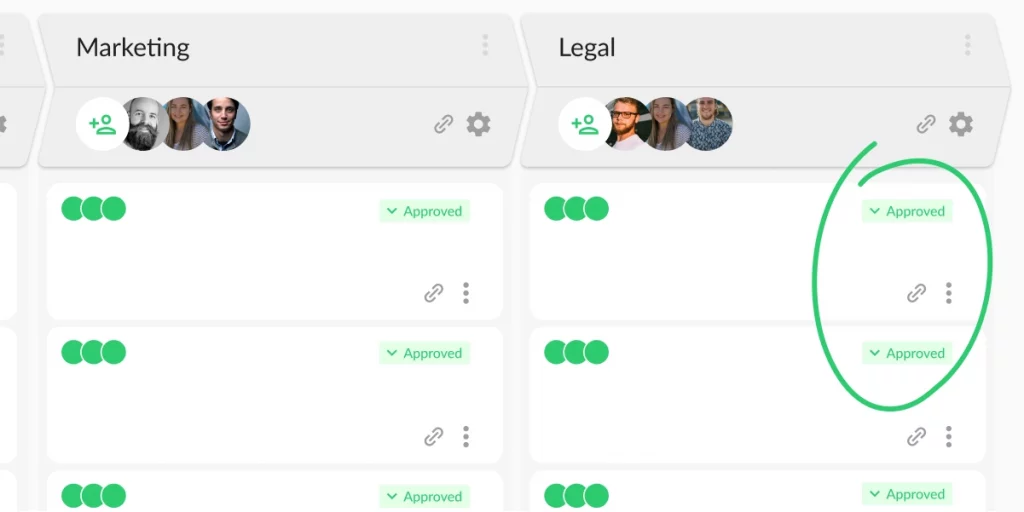
Keeping track of who’s approved what and not losing track of which designs you still need to review will help you create a smooth approval process.
How to optimize the design approval process
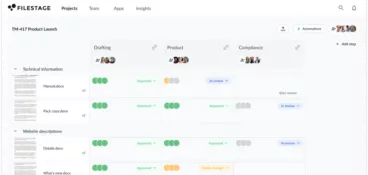
In Filestage, you can organize your design review process by designing separate review steps for each type of reviewer. On top of that, you can choose whether you want your reviewers to submit review decisions or just add their comments.
Your reviewers then have a choice between two buttons every time they give feedback:
✓ Approve
↻ Request changes
This way, you can easily see which documents need more work and which ones can move on to the next review step. Plus, if something gets published that shouldn’t have, you can go through your document’s review history to see where it all went wrong.
8. User testing – collecting feedback from real users or customers
User testing is a helpful tactic to get your design approved by the group that matters the most – your users and customers.
Here are some key benefits of user testing:
- Discovering important pain points
- Higher chances of creating a successful design
- Getting approval for your solution to a problem
- Building relationships for a continuous stream of feedback
How to optimize the user testing process
Even though you might struggle to get many customers to leave feedback on your design, the effort will be worth it.
There are a couple of things you can do if you want to maximize the amount of feedback:
- For smaller companies with loyal customers, simply reaching out to them will be the winning method. In such an environment, most customers will be happy to help. You can consider social media if you need to spread the word to a broader audience.
- Running focus groups and inviting people to give feedback on new designs is a highly successful method for bigger companies.
If you’re still having trouble attracting customers to leave feedback on your designs, you can always introduce some incentives. The reality is that people are more likely to help if a reward is waiting for them at the finish line.
The typical design process and methods to help you create your best work
When you think about design, your mind can go from graphic design all the way to fashion design in moments. But these two actually have way more in common than it seems when it comes to the design process and methods.
A typical design process consists of three main stages:
- Sketching ideas with pen and paper
- Developing a rough draft or wireframes
- Developing the final design
Sketching ideas with pen and paper
Just like in the old days, every design process still starts with the designer sketching their initial concept with pen and paper (or, these days, with a stylus and tablet).
In this stage, the graphic designer has all the freedom in the world to express their wildest imagination. However, the idea is to put those ideas on the paper and make it presentable so everyone can agree on the initial plan for the design.
Developing a rough draft or wireframes
Once everyone working on the project has a good idea of what the design is going to look like, it’s time to put your sketches in digital and create rough drafts and wireframes. Here different types of designers use different tools to make their lives easier.
Developing the rough draft may be the hardest and most rewarding part of the design work because here you’re implementing your ideas into a more realistic environment.
In other words, you’re following the rules and limitations that come with the tools you’re using or the brand guidelines that you’re designing for.
Developing your final version of design
Typically, after sketching a couple of rounds of feedback and going back to the drawing board, graphic designers reach the stage of developing the final version of their design.
It’s important that in this part of the process you’ve collected enough feedback from all your stakeholders so that you’re able to produce your best work. By this point, you should know all the requirements from different stakeholders and find ways to implement them into your work.
How graphic design flow can make or break your designs
In graphic design you’re often combining several elements and information in a single image with a distinct goal in mind. And it’s important to know how the people looking at your design are going to consume all the information from it.
That’s where having a good design flow will help and erase any confusion.
Let’s say you’re creating an image for the next webinar that your company is hosting. You want to create a design that will grab visitors’ attention, get them to understand what the webinar is about, and then look for information like the date and time and where to register.
By respecting the visual hierarchy of information in your design, you’ll effortlessly guide people through your content and make sure you’re communicating everything properly.
How to stay focused during the graphic design process
As much fun as designing is, it’s also exhausting to handle multiple projects at once or work on the same piece for months at a time. And sometimes, your focus and sources of inspiration dry out.
Here are three things experienced graphic designers do to stay focused on designing:
- Make a list of all your daily tasks
- Dedicate focus time and time for breaks
- Get in the zone with a Focus on Design playlist
Final thoughts
Once you establish an excellent graphic design process from start to finish, you’ll soon start to pick the fruits of your labor. So, make sure to tick all the boxes, cover all eight ways to optimize your design process, and enjoy creating outstanding designs! If you’d like to start collecting feedback on your graphic design with Filestage, start a free trial here →

