

Nowadays, a website is one of the most important pillars of a successful business. According to KPMG, roughly 50% of all customers check out a company’s website, before making a purchase.
For this reason, you need to ensure that your website is well-structured, has a consistent design and includes all of the necessary information your audience might be searching for. A good web design workflow helps you achieve this, by guiding you through the planning and implementation of every important step for your website.
This process comprises multiple work tasks and requires cross-functional collaboration, within very tight timeframes. But don’t be nervous; this article will help you create an efficient web design workflow and will guide you through the website design process – from planning to implementation.
What is a web design workflow?
A web design workflow is a set of processes that encompasses all of the work steps required to create a website.
“Design is not just what it looks and feels like. Design is how it works.” – Steve Jobs.
This famous quote from Steve Jobs perfectly summarizes the essence of what the term ‘design’ entails. Beautiful visuals and a unique style are certainly important, but only a small fraction of what website design is actually about.
The overall process can be broken down into three main phases:
- Planning: The planning phase usually takes place in two steps. The marketing function defines the objectives and target audience of the website, and the IT team translates this into a working infrastructure.
- Implementation: The content team brings the website to life through compelling visuals and copies, which resonate with the target audience. The IT function then integrates that content into the website.
- Testing and launch: The mockup website needs to be tested internally before being launched.
As you can probably imagine, there are many steps in the website design process, before people can visit a beautiful and well-functioning website.
A website design workflow structures and streamlines all web design processes.
The following paragraph will give you a better understanding of why you need to structure your web designing process.
Why should you have a web design workflow?
Some marketing managers and designers might ask themselves what benefit a web design workflow adds to the website development process.
The answer is that there are many advantages as it gives managers and designers the opportunity to carefully design and curate each, and every, part of the web design process.
We’ve summarized the three most important reasons why you should establish a web design workflow below.
Improved planning
As your plan is the foundation of your project, it’s vitally important to be as precise as possible. You need to have a clear understanding of all the processes that are involved to be able to create a working project timeline and a meaningful communication plan, which work inside and outside the organization.
Project documentation helps you gain a bird’s eye view over all processes, which will empower you to make informed decisions, anticipate challenges, and to structure the collaboration between all of your team members.
Time savings
Time is always a scarce resource; no matter whether you’re setting up a new product page or updating your company’s current homepage. A web design workflow helps you reorganize all of the design steps in the most efficient way, which results in increased productivity.
Time savings are a direct result of each individual team member’s improved productivity, as well as efficient cross-functional collaboration. Therefore, structuring the process of web design directly contributes to your marketing resource management strategy.
Improved quality and consistency
A web design workflow can also contribute to your content governance approach. Your team members will become better specialized in their respective areas, in the process of structuring your workflow. This leads to improved quality and consistency throughout all of your marketing assets.
For example, a specialized designer, who is only responsible only for key visuals will probably get better results than an all-rounder, who needs to work through multiple visuals to meet a deadline.
The benefits should be clear by now, so we’re going to explain the web design workflow, in the following section.
The eight steps of a web design workflow
What is the process of web design? How do I create a website workflow?
In the following, we’ll outline how to structure and implement your design workflow to produce better quality and speed up all of your processes.
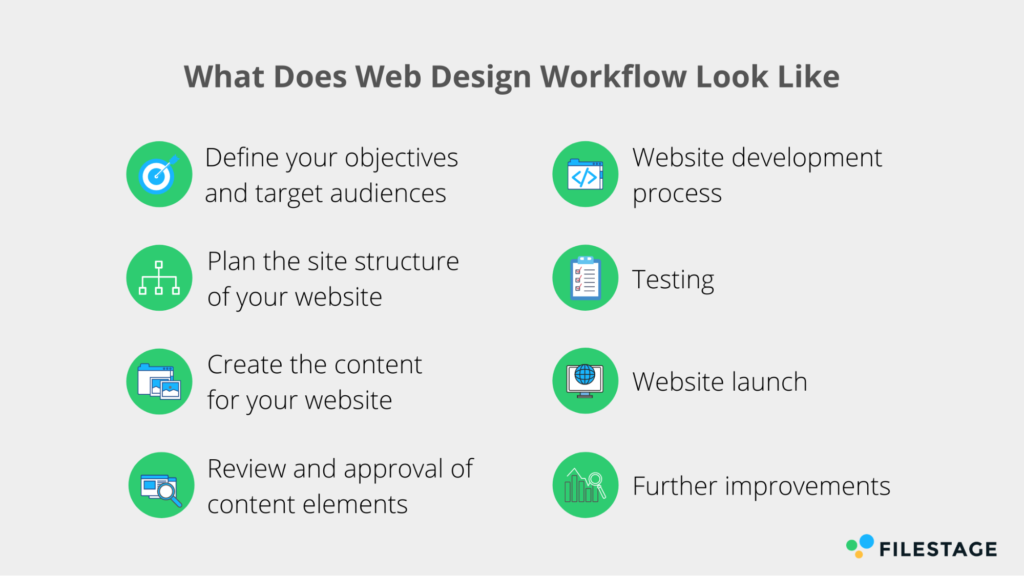
1. Define your objectives and target audiences
In the first step, you’ll need to define your objectives. These will differ, depending on your website.
Possible goals for your website may include:
- Selling products through the product page
- Attracting new staff through the Jobs section of your website
- Increasing brand awareness through your homepage
- Bringing a higher number of visitors to your blog
No matter what your objective is, make sure you make it measurable so that you can assess your web page’s success. Depending on your objectives, you might also need to define the target audiences of each website section, which may differ from the target audience of your products and/or services. For example, your career section caters to job seekers, whereas your product page caters to potential clients. This means your workflow should be adjusted accordingly, for each section of your website.
To give you a slightly more defined example, if the objective of your website is to sell your product or service, you’ll need to have a predefined sales target, as well as a buyer persona, to get started.
2. Plan the site structure of your website
Whereas the first step of the planning phase is usually done by the marketing function, the second step requires the support of the IT function, in order to outline the structure of your website.
The planning phase for structuring your website depends on the scope of the project, but usually involves the following steps:
Do your research
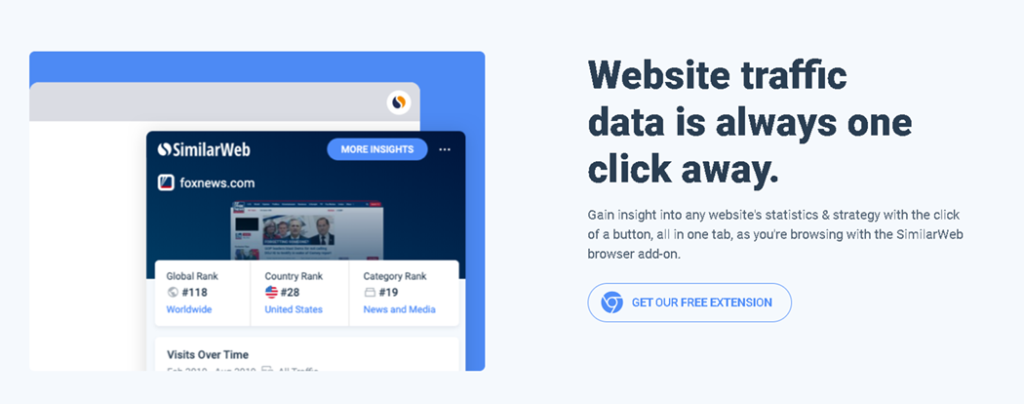
You don’t need to start from scratch when planning your website’s structure. No matter how unique your idea is, you’ll be sure to find inspiration to build upon. Therefore, take some time to look at the best practices inside your industry and carry out a competitor analysis.
Website traffic intelligence tools, such as SimilarWeb, can analyze the performance of other websites for you.
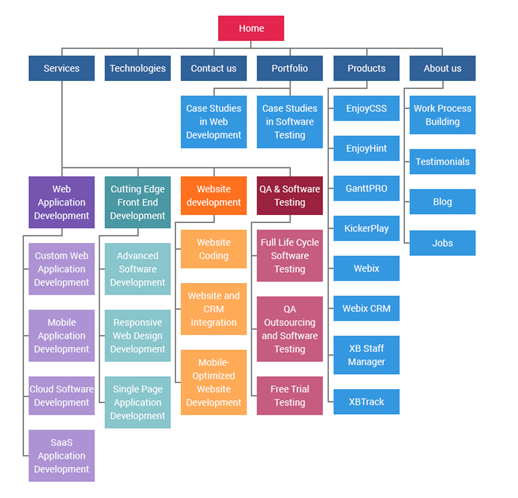
Create a sitemap
A sitemap is a list of all of the pages in your website. It serves multiple purposes:
- It’s a visual presentation of the actual website. A sitemap helps designers during the planning process.
- A sitemap provides information about your videos, pages and files, which makes it easier for search engines to crawl your site. A sitemap can improve your SEO and should, therefore, be an integral part of the design process.
Create a wireframe
The next step, after you’ve created the sitemap, is to make a wireframe of the website. A wireframe is the first visual representation of your website. It gives you a clear overview of how the user interfaces function, without being distracted by unnecessary visual elements.
Further below, we are going to introduce you to various tools, which will help you create a compelling wireframe.
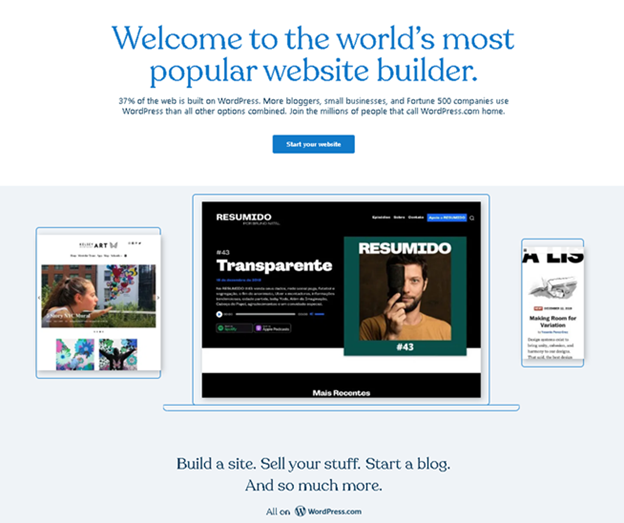
Decide on which CMS system to use
As the last step, you’ll need to choose a content management system (CMS), such as WordPress. A CMS helps you create and manage the content of your website – even if you don’t have deep technical knowledge.
The choice of the right CMS highly depends on your needs, your technical capabilities, and your current infrastructure.
If your company does not already use a CMS, there are various points to consider:
- Design options: What design capabilities does the CMS have?
- Ease of use: Do we have the technical knowledge required to operate the CMS?
- Data portability: Can we easily transfer data from the CMS to other platforms?
- Scalability: Can we add more features if needed?
3. Create the content for your website
While the previous steps included the marketing and IT function, the content creation process requires additional help from your content and design team.
Write briefs for all web pages
The marketing function needs to brief copywriters and designers so they can create content that aligns with the company’s communication strategy and objectives.
As we mentioned earlier, different website sections can have different goals and target audiences; so, it’s important to create a detailed brief for each individual website section. You can take some inspiration from our creative briefing template for this step.
Consider SEO
No matter what kind of website you create, SEO should be an integral part of your strategy. SEO tools, such as Ahrefs, support your keyword research. In addition to written content and a sitemap, you should consider image keywords and website meta tags, to further boost your SEO.

Create mockups and visual elements
The design team is mainly responsible for this step. Depending on how demanding the project is, and what kinds of images are being used, creating visuals can take a lot of time and will become a bottleneck if you lack a workflow.
For example, Apple’s iPhone SE product page displays visual elements through parallax scrolling, which requires close collaboration between the marketing, design, and IT functions.

You can streamline the content creation process further, by using content marketing tools, which are suitable for a multitude of purposes.
4. Review and approve your content and design elements
Creating your website content is just a small part of the process. No matter whether you create copies, graphics, or videos, once the creation process is finished you will still need to get approval from stakeholders and superiors – and this is where many marketing teams lose a lot of time and energy.
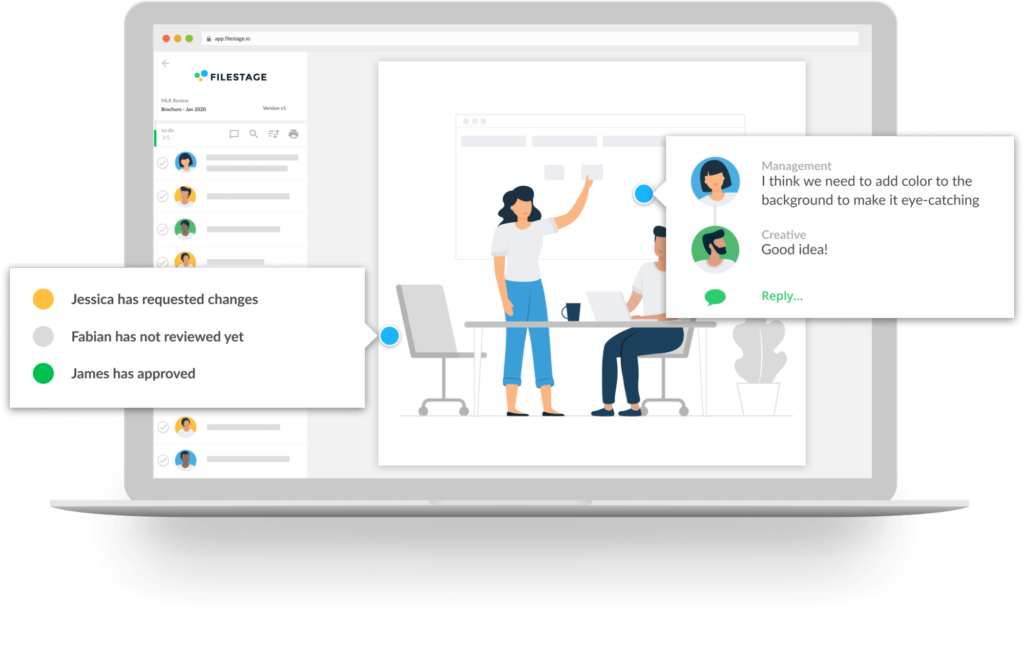
If your content review process is not structured, this step can take as long as the content creation process itself. In order to save time, ensure brand consistency and maintain high standards of quality throughout all of your assets, you’ll need to use online proofing software, such as Filestage.
Filestage lets you centralize the review and approval process onto one single platform, which allows all the relevant people to leave feedback quickly and easily. They can also add suggestions and give final approval of the content, while the project manager tracks the entire progress.
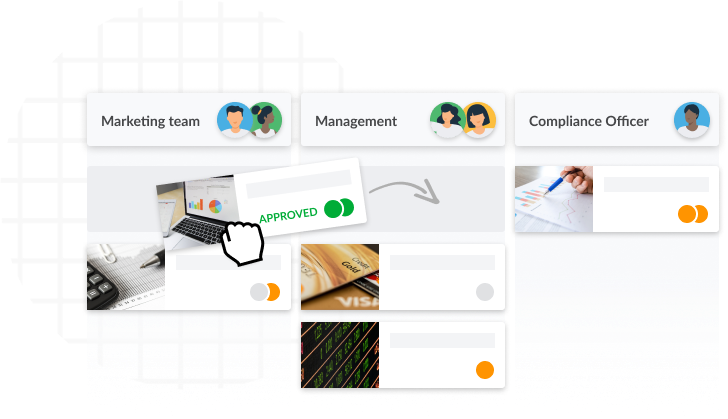
With Filestage, you can even review websites, animations, and HTML5 banners. As a result, you can further improve your launch time and add efficiency to busy IT functions.
Reviewing static websites only requires a screen capture plugin for your browser. A screenshot can easily be uploaded to Filestage as an image or a PDF. If you need to review animations, you can use a screencast tool, such as Bandicam.
5. Website development process
After your content has been approved, the IT team can start to integrate it into the website. Depending on which CMS system you’re using, the required degree of coding knowledge varies greatly.
At some point, knowing one of the big three coding languages, HTML, CSS, and PHP, comes in handy, especially if your website is getting more complex.
If you do not have a large internal IT function, it might be worthwhile to consider outsourcing this step to a third party.
6. Testing
Once the IT team has finished the website, you enter the testing phase.
Generally, this step is done by the marketing and the IT functions. In the testing phase, you’ll need to ensure that everything functions as intended. This includes:
- Fixing bugs: All interactive elements, such as videos, links and contact forms, need to be checked. If something doesn’t work as intended, the IT function needs to revise it and then you need to test it again.
- Check your content: The testing phase is the last opportunity to double-check your content. It’s important to verify whether the IT team has integrated all of the written and visual content into the correct pages, as discussed in your briefings.
- Check your SEO settings: Make sure that everything has been implemented to boost SEO, including sitemaps and meta tags.
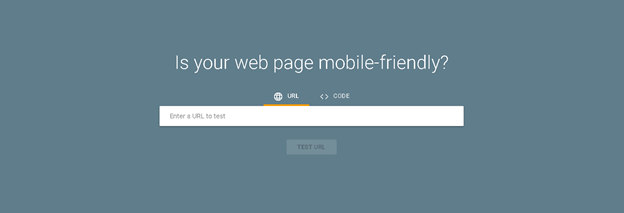
- Check mobile responsiveness: You need to verify that your website is mobile-friendly. You can either use the functions of your browser or external tools, such as Google Search Console’s mobile-friendly test.
7. Website launch
Once the testing phase is over, the launch phase can finally begin.
As a final step, you’ll need to choose a domain and hosting service, in order to launch your website. Most likely, your CMS will offer an integrated domain and hosting service.
Once your website is launched, there is still no time to relax. You’ll need to use tracking software, such as Google Analytics to collect all the important data about your website.
8. Further improvements
A website is not a one-off project. Based on the results of your tracking software or product changes, your website needs to be updated and maintained on a regular basis.
With the help of tracking software, you can gain a deeper insight into your target audience and their behavior, which can be used to make further improvements.
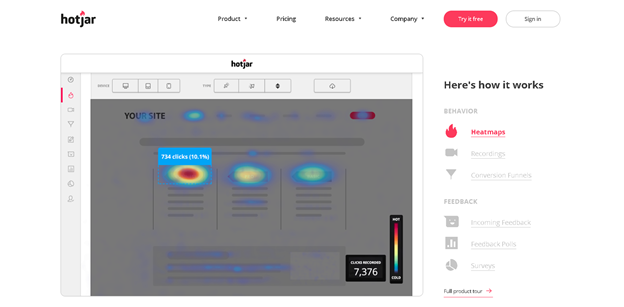
Besides Google Analytics, heatmap software, such as Hotjar, gives you an insight into how your audience is interacting with your website, by showing you a visual representation of their linking, tapping, and scrolling behavior.
Furthermore, in order to stay relevant and to attract new visitors, you should think about updating your content frequently. If you want to gain good SEO results, a constant output of new content, such as new blog entries, is necessary on a weekly basis.
Besides SEO, there are several other occasions, when an update is necessary. They include (but are not limited to):
- The new launch of a product or service
- Changes in an existing product or service
- Changes in contact info or staff biographies
- Announcements of upcoming events
We recommend you conduct yearly website audits, and complete website revamps, every three to four years, in order to stay up-to-date with the latest website design web developments.
If you have understood and digested this paragraph, you can now create your own web design workflow, by downloading our template.
Web design workflow checklist from Filestage
After all we’ve said about how to create a web design workflow, the good news is you don’t actually need to remember all of the steps above to get started.
As a first step, you can just download our web design workflow checklist, to start creating your own workflow.
Start the best web design workflow now, and make your campaign a success.
Three best practices to create an efficient web design workflow
How can you create a web design workflow?
Even if there is no golden rule of how web design development should be implemented, in order to be successful, there are a few best practices that we’ve taken from the most successful web design workflow examples.
Put your team first
To be successful, you need to rely on the resources of your team and to build your plan around your team members’ capabilities.
If you work in a smaller enterprise, the chances are high that you’ll need to outsource several of the tasks, such as parts of the content creation or the programming processes. This needs to be clear from the beginning, in order to avoid complications later on.
Furthermore, your workflow depends highly on the scope of your project. Make sure to add enough resources to heavy tasks and make use of tools, such as digital asset management software or graphic design tools, to support your team as much as possible.
Keep it simple
As we all know, plans never work out as expected. There are always unforeseeable events, which are beyond your control. Therefore, your workflow should focus only on the most important aspects, as outlined above.
Overplanning is one of the most common mistakes in project management. If you focus on too many details, they’ll just become a burden to you and your team members. Therefore, ensure that every task you add to your schedule adds value to the entire process, without taking up too much time or resources.
Communication is vital
If you are the manager of the project, it’s up to you to set up a communication plan. A communication plan structures all of the communication channels inside and outside of your teams and organization. Make sure to set up regular meetings, where all of the stakeholders can exchange the information, necessary to keep the project going.
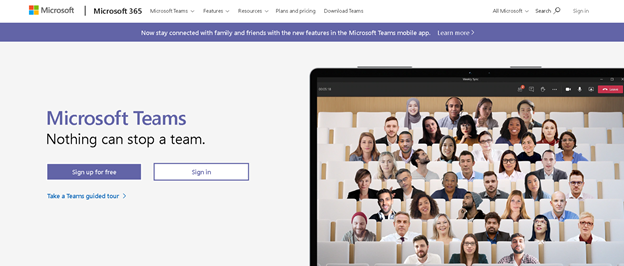
You can use communication software, such as Microsoft Teams, to make sure there is a steady flow of communication between all of the relevant stakeholders.
10+ tools to support your web design workflow
To make the most of your workflow, you can use multiple tools to support every step of the web design process.
In the following, we’ll introduce you to the most useful tools.
Filestage for content review and approval
With Filestage, busy marketing and creative teams can organize and streamline the feedback and approval of their work. One of the most common plus points of this platform is its user-friendly and easy-to-set-up interface, making online proofing for graphic designers smoother and straightforward.
You get a great view of everything concerning a file’s progress, as this tool keeps all your proofs in a centralized, customizable location. Filestage also offers a huge variety of great features, including real-time comments, due-date setting, versioning control, and the ability to assign role-based permissions.
Basecamp for planning

If you’re asking yourself how to get your workflow started, Basecamp might be the best solution to kick off your next project. The company provides one single platform, to facilitate the planning and implementation phase while introducing excellent communication and collaboration tools.
Sketch for creating a sitemap
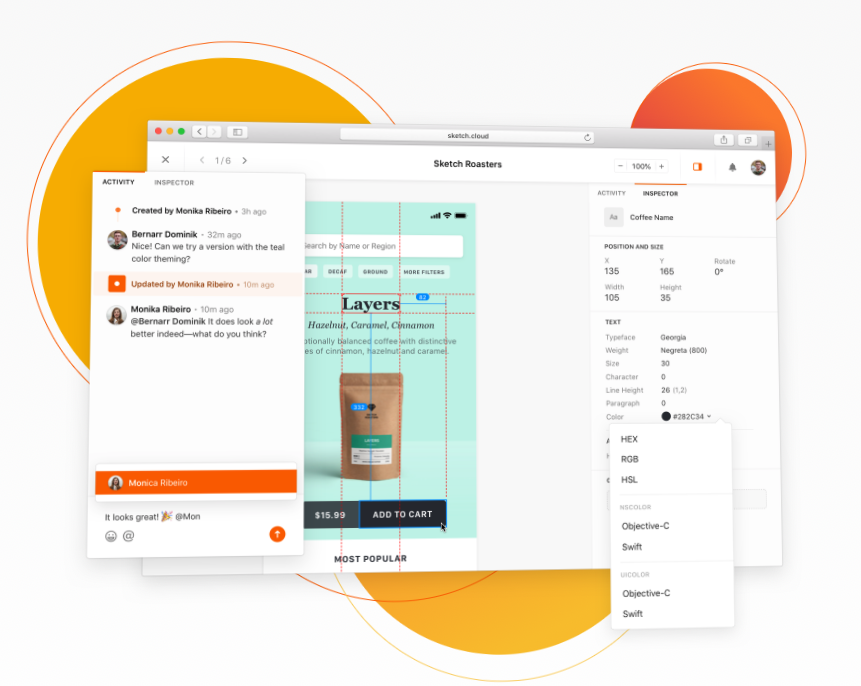
If you need to improve the efficiency of your design function, Sketch offers a single platform, where you can create reusable design components and establish a customized workflow, which is tailored to the needs of your design team. From sitemaps to complicated renderings – the platform streamlines all processes to unleash the creative power of the design function.
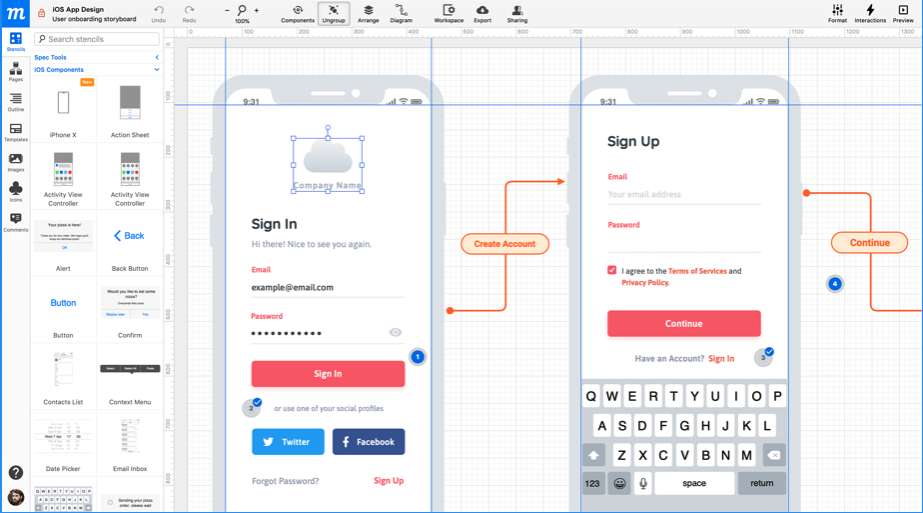
Lucidchart for wireframing
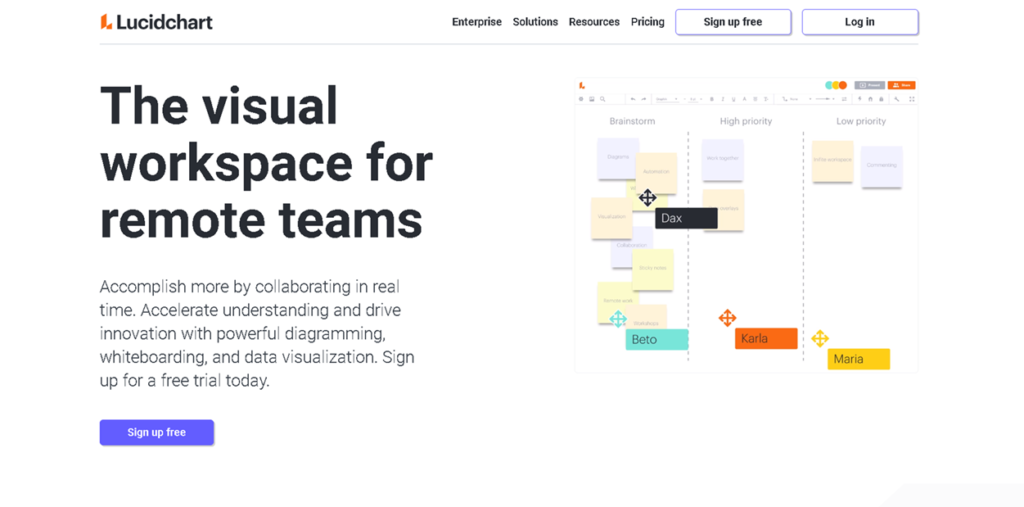
The IT function can also benefit from using collaboration and design tools. With Lucidchart, teams can create meaningful diagrams, whiteboards, and even wireframes, before sharing them with all of the related functions. Furthermore, the communication features facilitate collaboration within and across the organization.
CreateBrief for creating briefings

How can you create a meaningful content brief, which contains all of the necessary information, so that copywriters and designers can get started immediately? CreateBrief has the answer. Its online form can be filled out in just a couple of minutes and creates a thorough design brief, which can then be shared with all of the involved stakeholders.
Google Keyword Planner for SEO
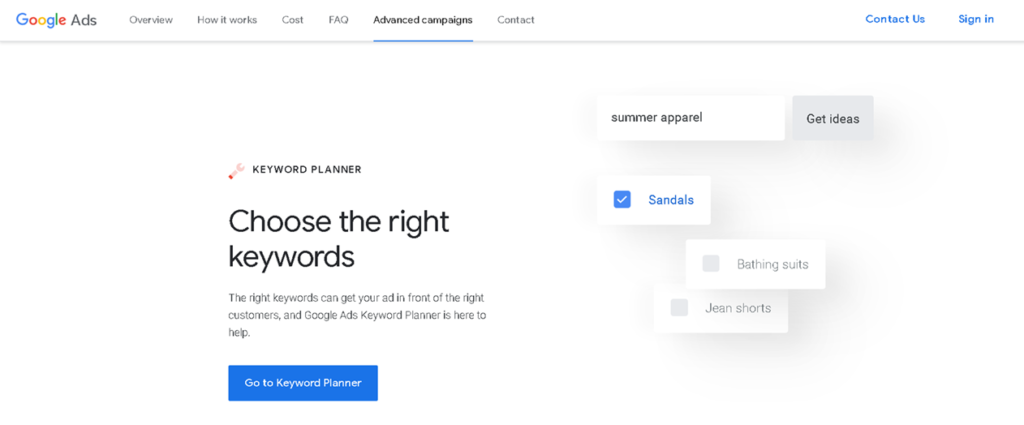
In addition to Ahrefs, you can also use the Google Keyword Planner. The tool is free, but you do need to have a Google Ads account to use it. The Google Keyword Planner lets you select the most relevant keywords, to further boost your SEO efforts.
Venngage for visual elements
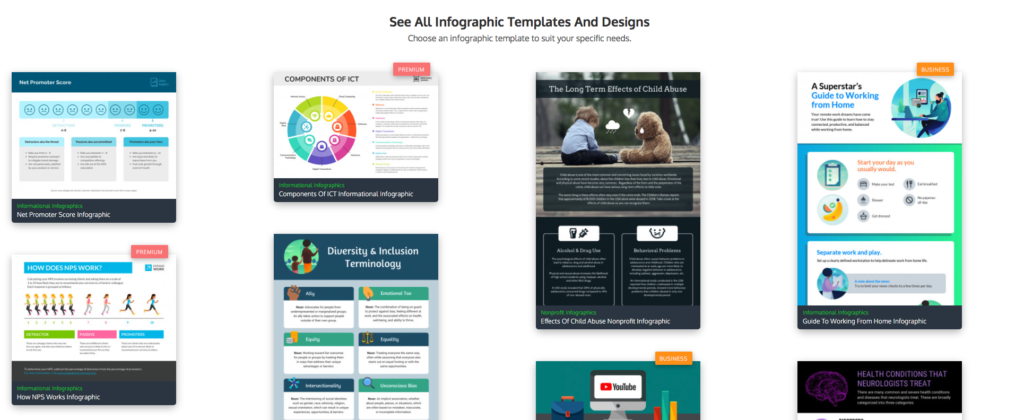
Sometimes it’s advisable to use specialized design tools, instead of starting from scratch. Venngage helps your design function create meaningful and customized infographics, which would take a lot of time to design in-house.
Moqups for mockups
No matter whether you need wireframes, mockups, or diagrams, Moqups is a design platform that allows your team to collaborate, in real-time, on multiple design-related tasks. From visualizing concepts to creating complicated interactive prototypes, the platform increases the efficiency of your design function.
GitHub for website development

GitHub is a project management platform that’s tailored to the needs of developers, which streamlines and organizes the coding process. The platform is scalable and gives the IT function all of the necessary tools to add to their arsenal.
SmartBear for testing
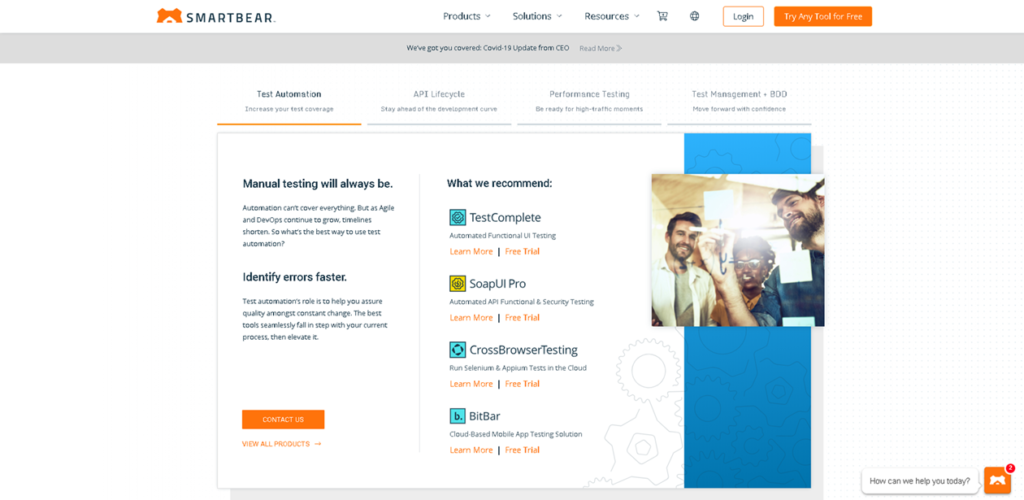
If you only test your website manually, you’re bound to miss bugs and content errors. SmartBear helps you establish a website QA process, through an automated user interface or API testing. This reduces time and ensures that your website launch will be successful.
Google Analytics for tracking
Google Analytics is the most commonly used tracking system on the market. It allows you to gain deep insights into your website audience and their behavior, which can help you to further optimize your website.
Conclusion
As you can see from the above, building a website is a complicated and complex process, which requires cross-functional collaboration throughout multiple stages.
We hope this article helps you to add more structure to your web design process and that it enables you to unleash the full creative potential of your marketing, design and IT functions.