If you’re a project manager, there are lots of reasons why you might find video projects to be daunting. For example, you might not have much technical knowledge, or you might be intimidated by the scale of these projects. But with this guide, you’ll be an expert in no time.
So here’s a crystal-clear look at ways you can optimize your video editing workflow.
What is a video editing workflow? (And why should I keep optimizing it?)
If you’re a creative project manager, there are lots of reasons why you might find video projects to be daunting. For example, you might not have much technical knowledge, or you might be intimidated by the scale of these projects. But with this guide, you’ll be an expert in no time.
So here’s a crystal-clear look at ways you can optimize your video editing workflows.
What is a video editing workflow? (and why should I keep optimizing it?)
A workflow is a proven step-by-step strategy that helps teams complete a particular task. A well-developed workflow determines the rhythm and order of tasks, in order to add a certain level of structure to the most complex projects.
Undoubtedly, a great video editing workflow can help your team efficiently tackle video editing.
With an excellent video workflow management, you’ll receive all the following benefits.
Keep things moving
Video editing is a complex task that’s made up of many smaller parts. Since a workflow adds a natural order to these smaller parts, it can keep things moving along. So after a certain task is completed, your team members will always know what’s next.
Predict potential issues
At the outset of a project, a workflow is a very useful tool. Equipped with a workflow, project managers can immediately start subdividing your project to predict any potential issues before they arise.
Boost satisfaction levels
Every professional likes to know what’s coming next. A workflow acts as a roadmap for your team, and it points the way to the finish line. Without it, your team might be left wandering in circles, which can impact satisfaction levels.
Workflows are very useful tools because you can adjust them over time—according to your best practices and the lessons you learn along the way. To cater your workflow to the fit of your team and its projects, you should constantly refine it.
Supercharge your video review rounds
Get point-and-click feedback on your video edits with Filestage.
The 7-step video editing workflow for project managers
The basic video editing workflow can be broken down into seven key steps. Here’s a closer look at the specifics involved in each step, including ways to master the editing workflow.
1. Make sure your team has enough appropriate material
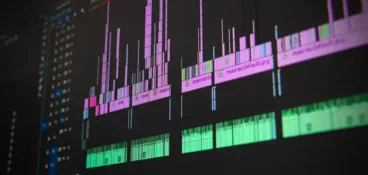
The video editing workflow begins when your video engineers perform a first pass. In other words, your video engineers should go through all of the raw footage from the shoot and organize it into two key groups: main footage and B-roll footage.
- As the name implies, your main footage is the key content that will act as the backbone for a video. Let’s imagine that you filmed a speech at a conference, and your footage of the speaker will act as the main footage.
- The B-roll footage is supplementary content you can use to create cutaway shots that build visual intrigue in your narrative. In the example above, your B-roll might include footage of audience members pleasantly listening to the speaker.
Overall, the first pass is important for these reasons:
- It helps your video engineers identify gaps in your footage. At this early stage in the process, they need to identify whether there are certain key shots missing, in order to find a solution.
- It gives your engineers the chance to quickly make any mechanical changes, such as eliminating junk footage.
- It allows your engineers the opportunity to identify the best shots. Then you can start building ways a final video might come together.
These three benefits help make the next step in the workflow much smoother.
2. Decide on your objectives and create your plan and timeline
After your team has finished the first pass, you’ll be better able to more clearly determine your objectives, create an accurate video editing plan, and develop a project timeline.
Here’s a look at ways to develop these three distinct resources.
Objectives
As with any other creative collateral, it’s important to have clear, distinct goals in mind for your video. These objectives should cover the following:
- The message
- The metrics
- The look and feel
- The technical goals (if any)
As a project manager, the team that commissions the project will either relay these objectives or develop them alongside the rest of your team.
Plan
As the name implies, a video editing plan is a step-by-step look at the ways you’re going to tackle your editing project. Since video editing plans need to be as concrete as possible, they should definitely include specific milestones and resource management tools.
As a project manager, you need to closely consult your video engineers as you develop your plan. After the first pass, your engineers will be able to offer an informed opinion about the project and deliver their suggestions.
For instance, your video engineer might find that the editing process will work more efficiently if two engineers tackle the B-roll while another one concentrates on the main footage.
Project managers should also bring their project knowledge and experience to the mix, so they can form a strong editing plan.
Timeline
As a project manager, you should consult with your video engineers to collect their time estimates, based on the first pass. You should consider their time estimates and carefully measure ways to more effectively predict future projects. Over time, you’ll naturally find that it gets easier to accurately predict these estimates and influence your workflow.
Overall, you’ll need to reconcile the availability of your video engineering team with the needs of your client.
3. Let your video team edit
Now that you’ve established your timeline, you should let your video engineers work their magic. As the project manager, you’ll want to add the following large tasks to the milestones you develop, as they relate to your chosen project management tool.
Organize video and audio files and make backups
To avoid any unexpected issues, your video engineers should start the editing project in earnest by organizing all project assets and creating backups.
Since the organization of assets varies, you should try to develop best practices and make your workflow as predictable as possible. For instance, you might want to suggest this kind of structure:
- Video files
- Main footage
- B-roll footage
- Audio files
- Voiceover
- Background music
- Sound effects
- Subtitles (SRT files)
- English
- French
- Visual effects
- Texture packs
- Transitions
It’s important to make sure your video engineers make multiple backups in different places. Specifically, they should store their project files on both servers and hard drives. And depending on your company policy, secure cloud storage is a third option.
Perform main editing
Your video engineers can start editing now that they have all their tools and assets in place. Video engineers will often have different preferences. So feel free to let them work their magic.
During the main editing process, you might want to review and approve different cuts. Of course, the details of this step depend on the editing plan and timeline you developed earlier.
The main edit should be approved before you make the post-production tweaks. This effort helps minimize disruptions and makes sure your engineers only polish the first draft after you’re finished with it.
Post-production tweaks
Once you’ve approved the main edit, it’s time for your video engineers to add the polish that will truly make your video shine. Lots of potential tasks are on-hand, which will vary according to your objectives.
Here are some of the main post-production tweaks your team could need to perform:
- Color-grading
- Timing of music and sound effects
- Application of textures
- More minor edits
4. Review and feedback
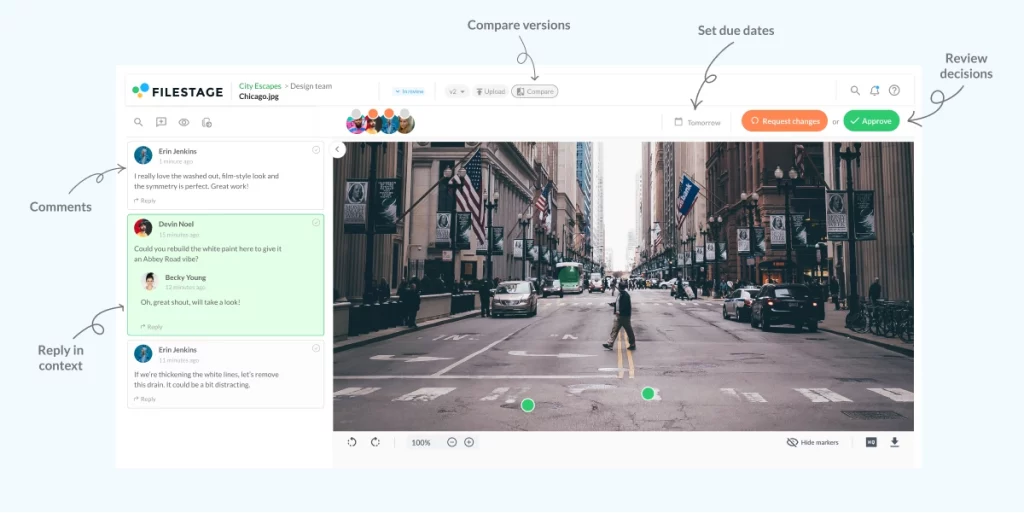
Now that your first draft is ready, it’s time to share it with your stakeholders and collect their feedback. Allow stakeholders to draw on the video and highlight ceratin areas for a more visual feedback.
Once you’ve collected this valuable feedback, your video engineers should work their magic and seamlessly incorporate it into the latest draft. This review protocol should continue until you have a version ready for final approval.
Overall, you’ll need to keep strategizing, as there are some very specific challenges when you’re collecting feedback on video work. Here are the main reasons why the review and feedback step is so tricky, as well as ways to solve these problems:
An inconvenient medium
Video files are often large, which could make them difficult to share with your team via traditional channels, such as email. In other words, you’ll need to find a video annotation platform for sharing and reviewing your content.
However, the file sizes are still very large, which can make the downloading process very slow for your stakeholders. In fact, it could be impossible for them to download your video. Moreover, your stakeholders might lack the appropriate software or codecs to play it. This setback could be frustrating, and it could cause you to miss out on critical feedback.
SOLUTION: You should try to find a cloud-based solution that allows your stakeholders to stream the video without having to download it.
A lack of technical knowledge
All of your stakeholders will have valuable opinions about your video, but it may be challenging for them to articulate their feedback, as the majority of people lack technical knowledge about video production. For instance, you might find that your stakeholders leave imprecise feedback that lacks timestamps, or that they lack the appropriate vocabulary to effectively communicate their ideas.
SOLUTION: You need a platform that empowers your stakeholders to leave in-context feedback that will remove any sense of ambiguity from their comments.
No transparency
When your stakeholders review your video, they will probably work in silos and possess no insight into the feedback of your other stakeholders. This lack of transparency can result in redundant—or even conflicting—feedback.
In addition, that feedback will inevitably be delivered across a number of channels, which will make life even more complicated for you and your video engineers. In fact, sorting through feedback could cause you a lot of headaches, and it could even derail your project.
SOLUTION: You should find a review and approval platform that adds a level of transparency to the video review process. This solution will empower your team members to make their voices heard, and it will reduce the potential for both duplicate and conflicting feedback.
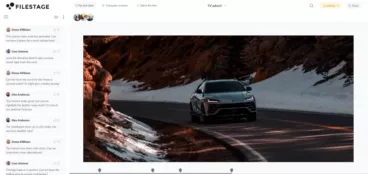
While there are a number of video collaboration tools out there, we recommend that you use Filestage. Our platform makes it easy for you to upload your video and share it with stakeholders (internal and external) within seconds.
These stakeholders can then deliver valuable in-context feedback that moves your video project forward. With an integrated to-do list, you can also make sure your engineers never miss a piece of stakeholder feedback and create a seamless video collaboration process.
5. Signoff and approval
Now that you have a final version ready for review, it’s time to ask your key stakeholders to give you their final approval.
Again, the same challenges apply to securing video approval. Since the files are often large, you can’t afford to suffer from a lack of transparency. Luckily, there are a number of video review and approval platforms out there that make it easy for you to share your videos and get the approval you need.
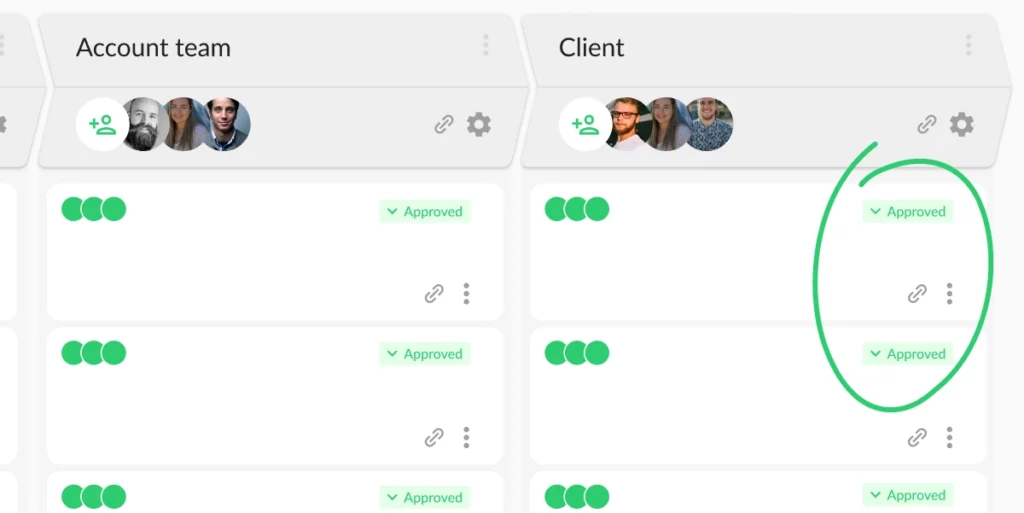
However, Filestage shows you the status of your project at a glance, so you can see who’s approved your file and who you’re still waiting for. This precision can expedite the signoff and approval process, so you can get your video published in record time.
6. Delivery
Congratulations! Your video has been approved!
But you haven’t quite reached the end of the road. Your video engineers still need to export the final project and deliver it according to the specifications they requested in your creative brief.
There are a number of ways to deliver large video files to your client. Here are some of the key options available to you:
- Burn a physical DVD.
- Send your files via email.
- Make the most of cloud storage services, such as:
- Use file-sharing apps, such as
- WeTransfer
- Sunshine
- MailBigFile
- Use BitTorrent to share large files.
- Use an FTP server.
When you deliver a finished video project, you have every reason to celebrate. This victory is also an excellent opportunity for you to impress your client and end the project on a positive note. So you can pull out all the stops and leave your clients with a lasting positive impression.
7. Organizing and archiving
After you’ve delivered your finished video file, it’s time to organize and archive all of the materials related to the project.
You never know when these materials might come in handy again, and it’s always important to have your various pieces of footage at hand. So this step can help you impress your client if they need another copy, and it can expedite future projects.
Therefore, you might want to upload the final version to a digital asset management platform, in order to make sure the appropriate people can access the file as needed.
Overall, it’s important for you to securely store all of your files and create backups.
5 Actionable video editing tips for project managers
Now that we have a clearer understanding of the overall media editing workflow, let’s take a closer look at some of the smaller techniques you can utilize to perfect it.
1. Master the first pass
The first pass can really make or break the entire video editing process. So your video engineers should learn to make the most of this step.
To make sure your video engineers can get the most from this important stage, you should take the following steps:
- Invest in training for your video engineers.
- Collect and share best practices.
- Give your engineers the resources and time they need.
2. Use shortcuts and macros
While video editing is often a time-consuming process, your video engineers can significantly expedite the process by using a variety of keyboard shortcuts and macros.
These useful shortcuts can help your video engineers keep their hands on their keyboards and exercise complete control over their chosen pieces of software. There are lots of insightful guides available online that can help your video engineers sharpen their skills and quickly edit your videos.
3. Invest in the right equipment and software
Video editing is a complex process that can be technically demanding. So to effectively edit your videos, your engineers will need all of the appropriate equipment and software, which include:
- Video-editing machines with vast amounts of storage
- Digital video-editing software
- Specialized keyboards and mice
- A high-quality monitor for editing
4. Backup (again and again)
For every project you do, it’s important for your video engineers to get into the habit of regularly saving and backing up their work.
You should provide the appropriate training and put the necessary guidance in place. Again, you need to make sure your engineers have all of the tools they need, which are listed above.
Overall, the key to success is guidance via nomenclature and clear version control.
5. Filter your junk footage
During the first pass, your video engineers will place the raw video content into a number of categories. One of those categories will be junk footage. As the name implies, this content won’t make it into the final cut.
But it’s important to make sure you don’t completely discard your junk footage. Therefore, your video engineers should categorize and store it for potential future use. Eventually, you might find that a previously useless piece of footage could become the key to the overall success of your video.
Overall, you can impress your client by having this junk footage stored but ready to access. Since they might need a piece of similar footage for an unrelated project in the future, you can come to their rescue by supplying the right junk footage.
Conclusion
We hope that this guide helps you confidently approach your video projects and create something truly special! If you’d like to speed up your review and approval process, be sure to access your free Filestage trial now.